What to do about cracks and control joints in your floor
Every concrete floor has or at least should have control joints in them and just about every floor has at least one crack. So lets start with control joints. A control joint is either a saw cut in the slab or a hand trowel groove. They are there to prevent cracks from happening in your floor as it expands and contracts. If your floor is relatively new(0-5 yrs) it’s not a good idea to fill them in. Especially when coating your floor with a high gloss epoxy. The epoxy will accentuate any crack that does occur and you know that crack will be right in the middle of your brand new epoxy floor.
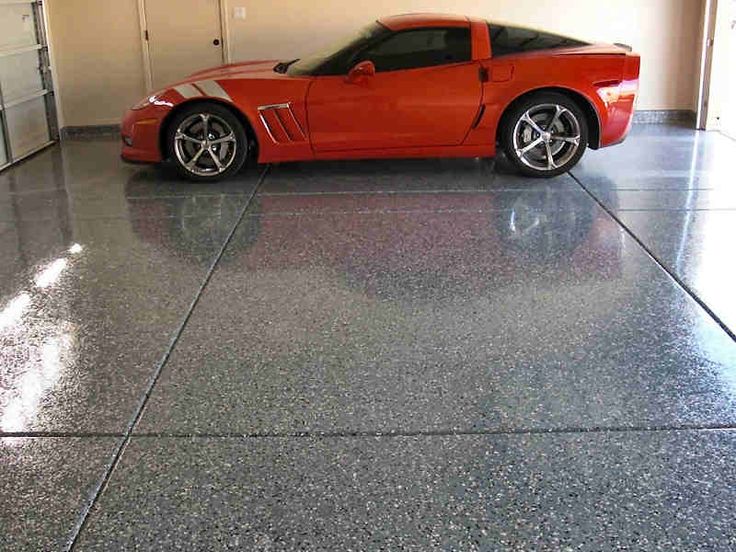
Leaving the control joints unfilled gives the floor some dimension and the epoxy makes each section look like a large slab of stone if using the chips or a slab of porcelain if not using the chips. All you need to do for a control joint as far as epoxying it is just feather the epoxy in and out of the joint with your roller. Don’t try to fill it with epoxy, you just want to coat the sides and the bottom of the joint. If using colored flakes, sprinkle the flakes evenly on either side and your control joint will now look like a natural stone joint.
If you’re floor is older and is done settling and you absolutely just can not stand the sight of those lines then you can fill them in with our Crack & Joint Compound. This is a Part A & Part B liquid that you mix with playground sand you buy locally till it becomes a grout like consistency. Then just use a mason trowel to fill in the joint and scrape it smooth. You use a hand grinder to further smoothen it if necessary after it cures. We would fill in the joints, do any grinding if needed to ensure a perfectly smooth finish, then do the clean and etching after.
If your joints have some sort of material in them it means they are expansion joints and not control joints. The same reasons to fill or not fill apply to these. But if you do want to fill them in you need to use a filler that is flexible such as our Flexible Joint Sealer. This will harden enough to accept a coating but stay flexible enough to expand and contract without cracking.
Finally lets talk about cracks. Even though our epoxy is very thick and will fill in small cracks we recommend you fill in the cracks anyway. Why, because even cracks that appear to be small may run the depth of the slab and filling them in will take lots of liquid epoxy to fill up and if the crack is all the way through the slab it’s a good chance the epoxy will drip out the bottom. So you may think you filled the crack only to find the epoxy sank in overnight. So best just get some of our Ready Coat Crack Filler. You just mix Part A & Part B together, putty knife it into your cracks and divots and then you can apply the epoxy right over it. No need to let it harden for 24 hrs or more like typical crack fillers. If a crack is just at the surface then you just coat over those. But if it looks like it goes deeper than don’t take a chance, fill it in, it doesn’t pay not to. On smaller cracks you may want to run a grinding wheel down them to V them out a little.
For large cracks, divots and holes use the Crack & Joint Compound mentioned above. What you don’t want to do is use some premixed retail grade filler in a tub or tube. These types of products always fail and will ruin the look of your beautiful floor when they do. If you have access to some quality product that you mix yourself then go right ahead and use it. Just make sure it’s paint compatible.
For other floor issues and repairs visit our Concrete Floor Repair Page. Everything you need to fix your floor is there. In a future post we’ll talk about floor leveling.

