Monthly Archives: December 2016


Multi-Color Epoxy Flooring DIY

HOW TO DO A MULTI-COLOR EPOXY FLOOR

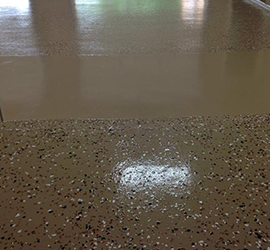
Girvan P. wanted a two color floor with a border. This is how he did it. Once the floor is properly prepped by etch acid etching or grinding and or both.  You apply the first base coat.  In Girvan’s case he wanted a solid color so we went with our Armor II commercial system. So he did the whole floor in Light Gray and then when that dried the next day he taped off the rectangles and applied the Dark Gray epoxy inside the tape lines. He let that dry and he then taped off the border area and lightly sanded the epoxy floor border area inside the taped area.  This was because the base coat had now been curing for more than 24 hours.  Anytime an epoxy coating cures for more than 24 hours you want to lightly sand it to give the epoxy coating going over it a rough surface to adhere too.  So once the border area was sanded he applied the Yellow epoxy coat.

Now he sanded the entire floor with a block & pole sander using 100 grit paper.  Got off all the dust and sanding residue and applied a clear topcoat over the entire floor.  He now has a beautiful two color epoxy floor with high performance commercial coating that will last many years to come.

It’s easier than it sounds to do these types of floors and you can use any colors or as many colors as you like. We at ArmorGarage can help you layout your floor and guide you on the best way to do it.  Like we did with Girvan.  Here’s what Girvan had to say in an email to us.

“Hi Jim –
New garage floor successfully installed (see pic)- it looks fabulous! This despite the onset of winter – we managed to keep the heat up sufficiently. Quantities were just right – half a can of clear coat left for touch ups.
Very many thanks for all your help
Girvan P.
Ottawa, Canada”

Fill in concrete cracks

WHEN AND HOW TO FILL IN CRACKS

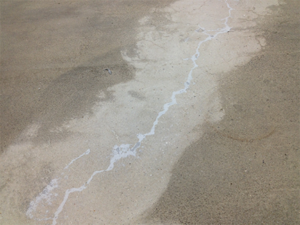
We get asked all the time when should cracks be repaired both size wise and timing wise as far as etching and coating the floor. Lets start with when you should repair any cracks or divots in your concrete floor. If you’re using our Ready Coat Crack Repair, you would do the repairs after you have cleaned and etched your floor and the floor has dried. You would then simply mix the Part A & Part B together to form a sort of a putty and then you would putty knife it into any cracks or divots. Let it sit a minute or two and then you can apply our epoxy right over it without having to wait for the putty to cure. This saves you a whole day or more waiting for your repair compound to cure.

For larger cracks and holes in your concrete slab we have a Crack & Joint compound. This Part A & B get mixed together and then you add in approximately 50lbs of playground sand per gallon of Mortar Liquids and mix together until it becomes a grout consistency. Then you trowel into the repair areas, scrape flat and let cure for at least 24 hrs. If some of your repairs came out a little rough, you can hand grind them smooth. Use this product prior to your etching. epoxy-crack-filler

When do cracks need to be filled in? Our epoxies are thick and can fill in surface cracks. The trick is to know if the crack is at the surface or if it runs the depth of the slab. Even hairline cracks that run the depth of the slab will consume a lot of epoxy to fill them up. Best to use one of our crack compounds to fill them in. For small cracks you can run a grinder wheel down the crack to V out to make it easier to apply the repair compound into them.

For Control Joints and Expansion Joints use the Epoxy Crack & Joint Compound with the sand to fill in. Please note we always recommend not filling them in. Once you fill these in you run the risk of getting a crack down the middle of your brand new high gloss epoxy floor. Especially on newer floors. Although these joints look unsightly now and are garbage collectors, keep in mind that once you’re done epoxying the floor the joints will actually make the floor look better and since the joints are now epoxy painted no dust and dirt will stick inside them. So, unless the control or expansion joints make you physically ill at the sight of them, don’t fill them in, just finish them inside and out with the epoxy.

Check all of our concrete crack repair products at www.armorgarage.com


Epoxy paint your floor in sections

HOW TO EPOXY PAINT YOUR FLOOR IN SECTIONS

Sometimes you have too much stuff on your floor to completely clear out or maybe you just can’t stop what you’re doing business wise on the whole floor at the same time. So you need to do the floor in sections so you can move your stuff around and or keep your business running while you redo your floor with an epoxy flooring coat.

Garage Floor EpoxyOnce the floor is properly prepared (see how to prepare your floor for epoxy coating) you would apply a good duct tape line to section off the floor. Do not use painters tape since our epoxy is too thick for that. Apply the first epoxy floor coat up to the tape line and let dry. Then apply the second coat but stay back 6-12” from the tape line. If doing a third coat as in the case of our Military Epoxy System, stay back 12” from the edge of the second coat. Thus creating a step effect with the floor epoxy.

Then carefully remove the tape, razor cutting the edge will most likely be needed. Before applying the first coat of the next section, lightly sand the first 6-12” strip of the first section to rough up. Then apply the epoxy to the second section and lightly overlap onto that sanded strip of the first section. For the second coat, you will lightly sand the strip of the second coat from the first section and lightly overlap the new section over that. Do the same if doing a third coat. The reason you need to sand those stripes is that after 24 hours the epoxy pores start closing and may affect the bonding of the overlapping epoxy.

Follow this method and the epoxies will all blend into one monolithic coating making your floor look like you did it all in one shot.