Epoxy Coating


ALL 100% SOLIDS EPOXIES ARE NOT CREATED EQUAL

As with most products in life there are similarities and also big differences in products that sound and look the same. Today there are lots of epoxy floor coatings proclaiming to be heavy duty, 100% solids or that high solids are good enough(no they’re not!). So what’s the difference and how can you tell which is the best product?? First be careful who you buy from. There’s a lot that can throw you off such as some companies advertise their epoxies as 100% solids when in fact they’re only 100% solids by weight and not volume which means they’re not truly 100% solids. See what we mean? When you purchase an ArmorGarage Epoxy System that is 100% solids it’s 100% solids by weight and volume in addition to being Military Grade 100% solids. Cyclioaliphatic epoxies tout being 100% solids but they are not military grade by any means. They’re a hybrid solids epoxy designed for cost savings. When doing an epoxy flooring project, saving a few dollars should not be your main criteria. It always costs you more money and heartache in the long run.

What are some of the other things to watch out for. Know that there is no such thing as lifetime epoxy coatings. Products advertised as such are just marketing gimmicks and you will never get lifetime warranty coverage on such epoxies. Also realize that warranties against Hot Tire Pick or peeling off is not the same as coverage from the epoxy wearing off! We offer a 5 year warranty against wear. Wear is the single most important factor you should be concerned with when buying an garage epoxy floor coating. The durability of the coating is what determines not only how long it will last but also how long it stays looking new. Most epoxy floors look great when first put down but soon start looking old and dirty when they’re not military grade. So when purchasing your garage epoxy flooring ask them what the guarantee on wear is. We get 100s of calls from customers who thought they were putting down heavy duty epoxy only to find out a lot sooner then they ever expected that the product they purchased was nowhere near heavy duty as claimed.

Beware of water based epoxies, these are all inferior and their claimed to fame is that they are environmentally friendly. That’s true but they don’t work well at all. First off they are up to 50% water so when you apply them 50% of the epoxy you bought evaporates into thin air leaving you with a paper thin coating. How can you tell if an epoxy is water based? It usually has a “WB” in the model number or part number. Also the pot life is usually in hours rather than minutes.

Water Based Epoxy Floor Coatings

Another thing to look out for is the final thickness of the finished product. ArmorGarage garage epoxies Armor Chip & Armor Granite are 20-30 mils thick versus some so called 100% solids and heavy duty epoxies that are 2-10 mils thick only. We can go on but hope you get the idea. If you haven’t done this before there’s a lot of things you don’t know about that will effect your satisfaction with the time and money you spent on doing your epoxy flooring project.

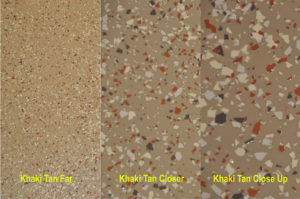
NEW PRODUCTS

NO PREP INSTANT PRIMER & VCT TILE COATING

ArmorGarage has added some amazing new products to our product lineup. 

First up is our game changing epoxy primer that requires virtually no prep and can instantly be epoxy coated over. You simply need to remove any nonbondable contaminants such as surface dirt, oil, grease or rust etc. This works over dirty concrete you just need to remove any dust with a vac or leaf blower or any dirt buildups. Then simply use our Acetone resistant hand pump sprayer or one of your own and spray down the primer. Let sit for 15 minutes till it gets tacky. Then immediately apply any ArmorGarage epoxy floor coating. This primer is super high performance and cannot be separated from concrete once it cures. Apply all the epoxy within 90 minutes. You can do the floor in sections, this gives you 90 minutes for each section to ensure you apply the epoxy within the coating window. If you miss the coating window for any reason simply scuff the primer with 120 grit and reapply some primer. This amazing primer utilizes ArmorGarage epoxy technology combined with Primera Nano Technology to allow it to stick to almost anything. Great for concrete floors with exposed aggregate(small river stones at the surface) and other hard to bond to surfaces. Thus eliminating the need for shot blasting, diamond grinding or etching. Saving time and money. This is a great solution for jobs that have limited down time. See the product here: https://www.armorgarage.com/noprinpr.html or contact us for help from one of our Reps.

Next up is our revolutionary VCT & Vinyl Floor Coating. Putting a permanent clear coat on VCT Tile and Vinyl Flooring has been the Holy Grail of the epoxy coating business. There are plenty of coatings that can be applied but none that will permanently adhere till now. We have gotten thousands of calls from customers that are looking to get out of the constant stripping and waxing of their vinyl floors. Stripping and waxing is time consuming and costly and must be done continuously or the your floor will start to look very shabby very quickly. ArmorGarage’s epoxy technology once again combined with Primera Nano Technology allows our clear liquified epoxy quartz coating to be sprayed onto any type of vinyl floor or linoleum and totally bond to it. Dries to a beautiful clear gloss finish that is extremely durable and easily cleaned. Eliminates scrubbing, stripping and waxing. This is a fantastic product for institutional and commercial applications in large high traffic areas where cleanliness is critical.

For more information see here https://www.armorgarage.com/vcttilivishc.html or talk to one of our expert Reps today.


ArmorGarage Is Here To Help

Recently we received a call from a large manufacturer that makes a type of caustic polymer that is poured into large vats at 500 degrees. They needed a coating to protect the vats from corrosion and to prevent the polymers from sticking to the concrete. We have many epoxy coatings for a wide variety of applications but nothing that could stand up to a continuous 500 degrees. So we did some research and discovered a company that makes an industrial grade ceramic epoxy coating. There were many other ceramic coatings but they were all residential grade and mostly for use as an upgrade to car wax or other very light duty needs but this one product was geared towards industrial applications. So we called this customer back with the bad news that we couldn’t provide a product to fit their needs but good news that we found a company that most likely could. They were very appreciative and promised that we would get the call for their upcoming flooring projects.

One of the most important keys to a successful coating application is to make sure you choose the right product for your specific application. That’s why we offer so many different types of epoxy coating products, in fact we have a section called Specialty Coatings. There is no one type epoxy fits all product or at least there shouldn’t be. Take a look around our website and be sure to checkout the Specialty Coating section. We also have what we think is the most informative website with regards to epoxy coating product information and how to choose and apply on correctly so you only have to do it once, so take a look at the Need To Know section. If for some reason you don’t think any of our products fit your needs give us a call or shoot us an email it may just be that your application is not listed for a particular product since there are 100s of different uses we can’t list them all. We can double check to see if one of our products will work for you or steer you in the right direction to find a product that will work for you.


FULL BROADCAST EPOXY FLOOR

SHOULD YOU DO A FULL BROADCAST EPOXY FLOOR?

The short answer is no unless you’re a professional and have done it many times before. Many customers call us and state they would like to do a full broadcast color flake epoxy floor for their garage or shop. Then after speaking with us for a few minutes they change their minds.

Epoxy Flooring ChipsIt may seem like a good idea when you read about it but doing it is much harder than it sounds. First off you need a tremendous amount of flakes, 70-75lbs of flakes for a typical 2 ½ car garage. Trying to do it with less chips and your floor will come out blotchy! Then you have the problem of applying so many flakes without them piling up in uneven lumps. If you’re not experienced in applying the color flakes they will end up in uneven layers and piles. Other companies trying to sell you on this will tell you that you can scrape the chips down. Again easier said than done and even after scraping and even sanding, the floor won’t look right.

So in addition to having your brand new epoxy floor not looking right, you’ll have to spend additional money to purchase a lot more topcoat. When you do a full broadcast, all those chips piled on top of each other create lots of nook and crannies. Those nooks and crannies have to be filled with topcoat, so plan on spending a lot more money on topcoat and time applying it in at least two coats or maybe three.

How do we know this? We know this from the thousands of floors we’ve done with our own guys. They have to know what they’re doing and even they screw it up every now and then. Which means they have to grind the floor off and start over. That’s why over 90% of the floors we do are not full broadcast. ArmorGarage offers two color flake floor options. The Armor Chip Garage Epoxy Flooring kit which provides you with about 75% chip coverage. Our Armor Granite kits provide you with 90% coverage. Both of these floors use the base epoxy color as one of the background colors. They both provide a beautiful finish that looks like you had a Pro do it for you even though you did it yourself for a fraction of the price. In fact, most customers don’t use all the color flakes we provide in each kit. We provide you the most color chips of any company so that you can apply the color chips until you like the pattern without having to worry about running out.

So why spend extra time and money and run the risk of having your floor not looking the way it should when you can get a gorgeous looking floor every time with our Armor Chip or Armor Granite Epoxy flooring kits.


Multi-Color Epoxy Flooring DIY

HOW TO DO A MULTI-COLOR EPOXY FLOOR

Girvan P. wanted a two color floor with a border. This is how he did it. Once the floor is properly prepped by etch acid etching or grinding and or both.  You apply the first base coat.  In Girvan’s case he wanted a solid color so we went with our Armor II commercial system. So he did the whole floor in Light Gray and then when that dried the next day he taped off the rectangles and applied the Dark Gray epoxy inside the tape lines. He let that dry and he then taped off the border area and lightly sanded the epoxy floor border area inside the taped area.  This was because the base coat had now been curing for more than 24 hours.  Anytime an epoxy coating cures for more than 24 hours you want to lightly sand it to give the epoxy coating going over it a rough surface to adhere too.  So once the border area was sanded he applied the Yellow epoxy coat.
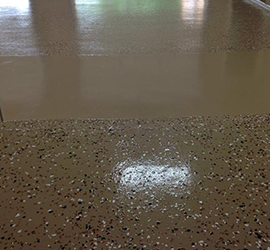
Now he sanded the entire floor with a block & pole sander using 100 grit paper.  Got off all the dust and sanding residue and applied a clear topcoat over the entire floor.  He now has a beautiful two color epoxy floor with high performance commercial coating that will last many years to come.

It’s easier than it sounds to do these types of floors and you can use any colors or as many colors as you like. We at ArmorGarage can help you layout your floor and guide you on the best way to do it.  Like we did with Girvan.  Here’s what Girvan had to say in an email to us.

“Hi Jim –
New garage floor successfully installed (see pic)- it looks fabulous! This despite the onset of winter – we managed to keep the heat up sufficiently. Quantities were just right – half a can of clear coat left for touch ups.
Very many thanks for all your help
Girvan P.
Ottawa, Canada”


Epoxy paint your floor in sections

HOW TO EPOXY PAINT YOUR FLOOR IN SECTIONS

Sometimes you have too much stuff on your floor to completely clear out or maybe you just can’t stop what you’re doing business wise on the whole floor at the same time. So you need to do the floor in sections so you can move your stuff around and or keep your business running while you redo your floor with an epoxy flooring coat.

Garage Floor EpoxyOnce the floor is properly prepared (see how to prepare your floor for epoxy coating) you would apply a good duct tape line to section off the floor. Do not use painters tape since our epoxy is too thick for that. Apply the first epoxy floor coat up to the tape line and let dry. Then apply the second coat but stay back 6-12” from the tape line. If doing a third coat as in the case of our Military Epoxy System, stay back 12” from the edge of the second coat. Thus creating a step effect with the floor epoxy.
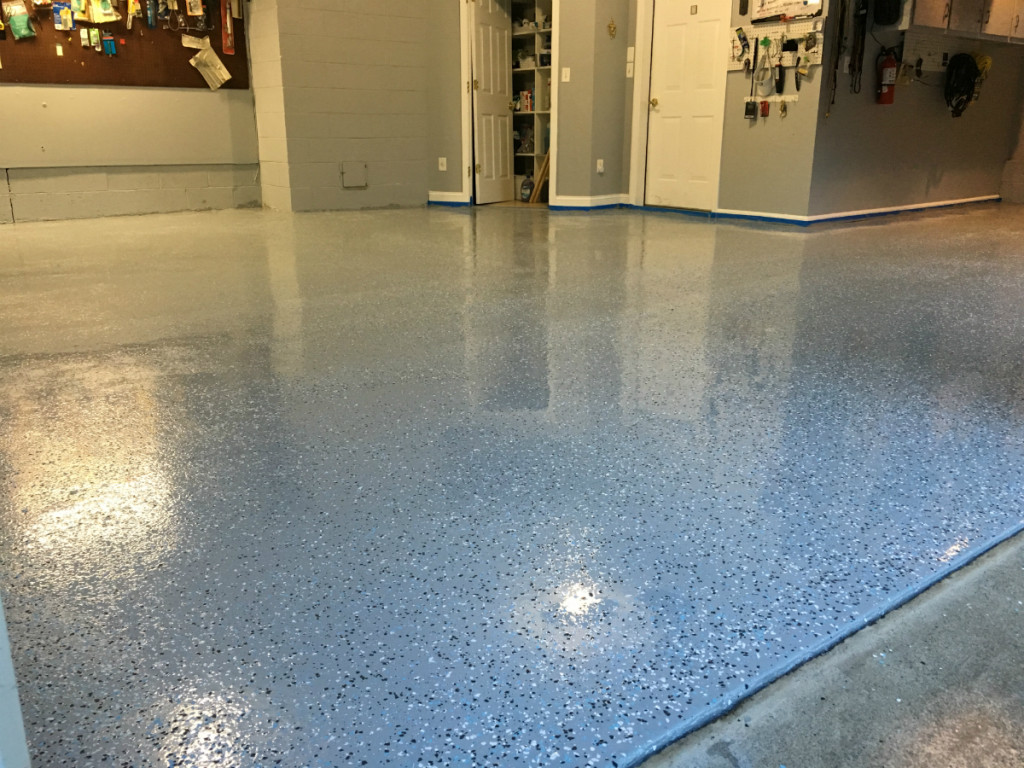
Then carefully remove the tape, razor cutting the edge will most likely be needed. Before applying the first coat of the next section, lightly sand the first 6-12” strip of the first section to rough up. Then apply the epoxy to the second section and lightly overlap onto that sanded strip of the first section. For the second coat, you will lightly sand the strip of the second coat from the first section and lightly overlap the new section over that. Do the same if doing a third coat. The reason you need to sand those stripes is that after 24 hours the epoxy pores start closing and may affect the bonding of the overlapping epoxy.

Follow this method and the epoxies will all blend into one monolithic coating making your floor look like you did it all in one shot.


Ready to Install Garage Flooring? Make sure you Read this Checklist!

Installing Garage Flooring

garage floor epoxy coatingSo you’re ready to install garage epoxy flooring, but you’re not quite sure how to go about it. Don’t worry, you’re not alone! The first thing you need to do is make sure that you have the right materials, and that means buying a high quality epoxy flooring. Once you have it properly applied to your floor you will experience a number of different benefits. Most notably, your floor is going to look a lot better than it did as just bare concrete.
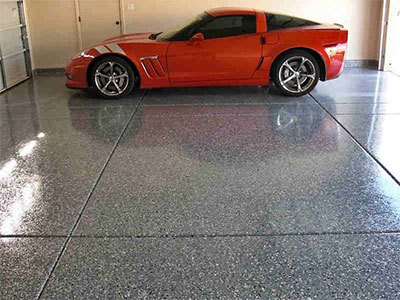
Along with that, it’s going to protect your concrete floor from the elements and harmful vehicle fluids. There are many other benefits, such as greater reflection (it’s going to be brighter), greater resistance to scratching, and of course, easier cleaning. Before you can apply your new flooring however, there are a few things that you will need to get out of the way. Take a look at our checklist and make sure you’re ready to give your floor the upgrade of a lifetime.

Preparing your Floor

The first and most obvious thing you will want to do is to properly prep your concrete for the new garage floor epoxy. You will need to start by clearing it out, obviously, and then you can move on to the more important business of cleaning it. The idea is to get your floor back to the condition it was in after it was first laid – it’s a bit of a chore but totally worth it. To get it done thoroughly, we strongly recommend that you do a thorough acid etching. It’s a procedure that might take two passes, but it is a critical step to get the proper bond between the epoxy and your floor. Of course if your floor is really dirty and in poor condition, shot blasting or grinding might be needed to get you a better profile. You can also try the combination of a tornado diamond buffing pad and super blue cleaning solution from Concrete Floor Supply Inc. However, if you do not want to do it yourself and would much rather prefer a professional doing it, you can always check out companies like floor buffing services in NYC or ones more local to you to get your garage the way you want it.

Get the Right Tools

You need the right tools for the job, and when it comes to epoxy flooring, that means making sure you have rollers (multiples if you are having someone help you), jiffy mixer, duct tape but perhaps the most important, and the most overlooked piece of equipment, is the calibrated squeegee not just a flat squeegee, this helps spread the epoxy at the right thickness. For more detailed application info see our How To Prep and Epoxy Paint Your Floor Page. Make sure you use a good duct tape tape and some Xylene for cleanup. Painter’s tape is too thin for our epoxy, duct tape ensures that you do not inadvertently get epoxy seeping over or through the tape. In most cases, especially with paint, you could simply ‘wipe it off’ if you made a mistake, but our epoxy is a bit different. As we like to say, once it’s on, it’s on. That said, if you make any mistakes, wipe the epoxy clean immediately with Xylene – otherwise you’ll have to sand or grind it off.

Have a Topcoat Ready

Install Garage Flooring

The biggest mistake people make, aside from forgetting to tape off their walls, is not applying a topcoat. Your floor needs a topcoat for several reasons! First of all, it makes the floor look even better than it would with just a layer of epoxy coating on it since it has a higher gloss finish. Another great reason to apply a topcoat rather than just a clear epoxy is that a real topcoat is much much harder than an epoxy. Remember – epoxy is NOT a topcoat and you can’t make an epoxy into a topcoat by just adding in some UV or other additives like some of our competition claims to do!

The above information will go a long way toward helping you to successfully apply your epoxy coating, and you will quickly find that your floor is much more enjoyable. Once you have applied your floor coating, however, do try to remember that it’s not completely impervious to damage. It cannot take massive impacts, such as dropping an engine block onto it, but it can should withstand dropped tools and parts. That being said, now would be a great time to start looking into epoxy flooring and making sure that your surface is ready for what’s coming. Most importantly, when your floor is finished, you are going to want to look after it. You can visit here to find comparison reviews of wall mounted garage vacuums. This is especially important if you want your epoxy floor to last as long as possible.

Remember, a properly applied high-quality epoxy coating will last for a long time, and in most cases, for at least ten to twenty years. If taken care of properly, the sky really can be the limit as far as longevity is concerned. The most important piece of advice that we can give you in this regard, is to avoid purchasing discounted or store-bought epoxy. Buy the best and reap the benefits for many years to come.


Epoxy Coating Over An Oil Stained Floor

Epoxy Coating Over An Oil Stained Floor

If your floor is full of oil stains you need to be very careful on how you prep it before applying any epoxy coating to it. Oil stains are at best difficult to get out and in most cases can be downright impossible to remove. If you have light oil stains you can use our Oil & Grease Remover or similar quality product. You can use Liquid Tide scrubbed in with some Muratic Acid. If either or both those methods fail then you need to use our proprietary Oil Stain Primer . It is specially engineered to actually bond with oil on the molecular level. It is the only way you will get epoxy to stick to your floor. Also if you have stains all over the place we recommend that you prime the whole floor so that you don’t get different color shading in the epoxy since the primer is very dark in color.

Epoxy Coating

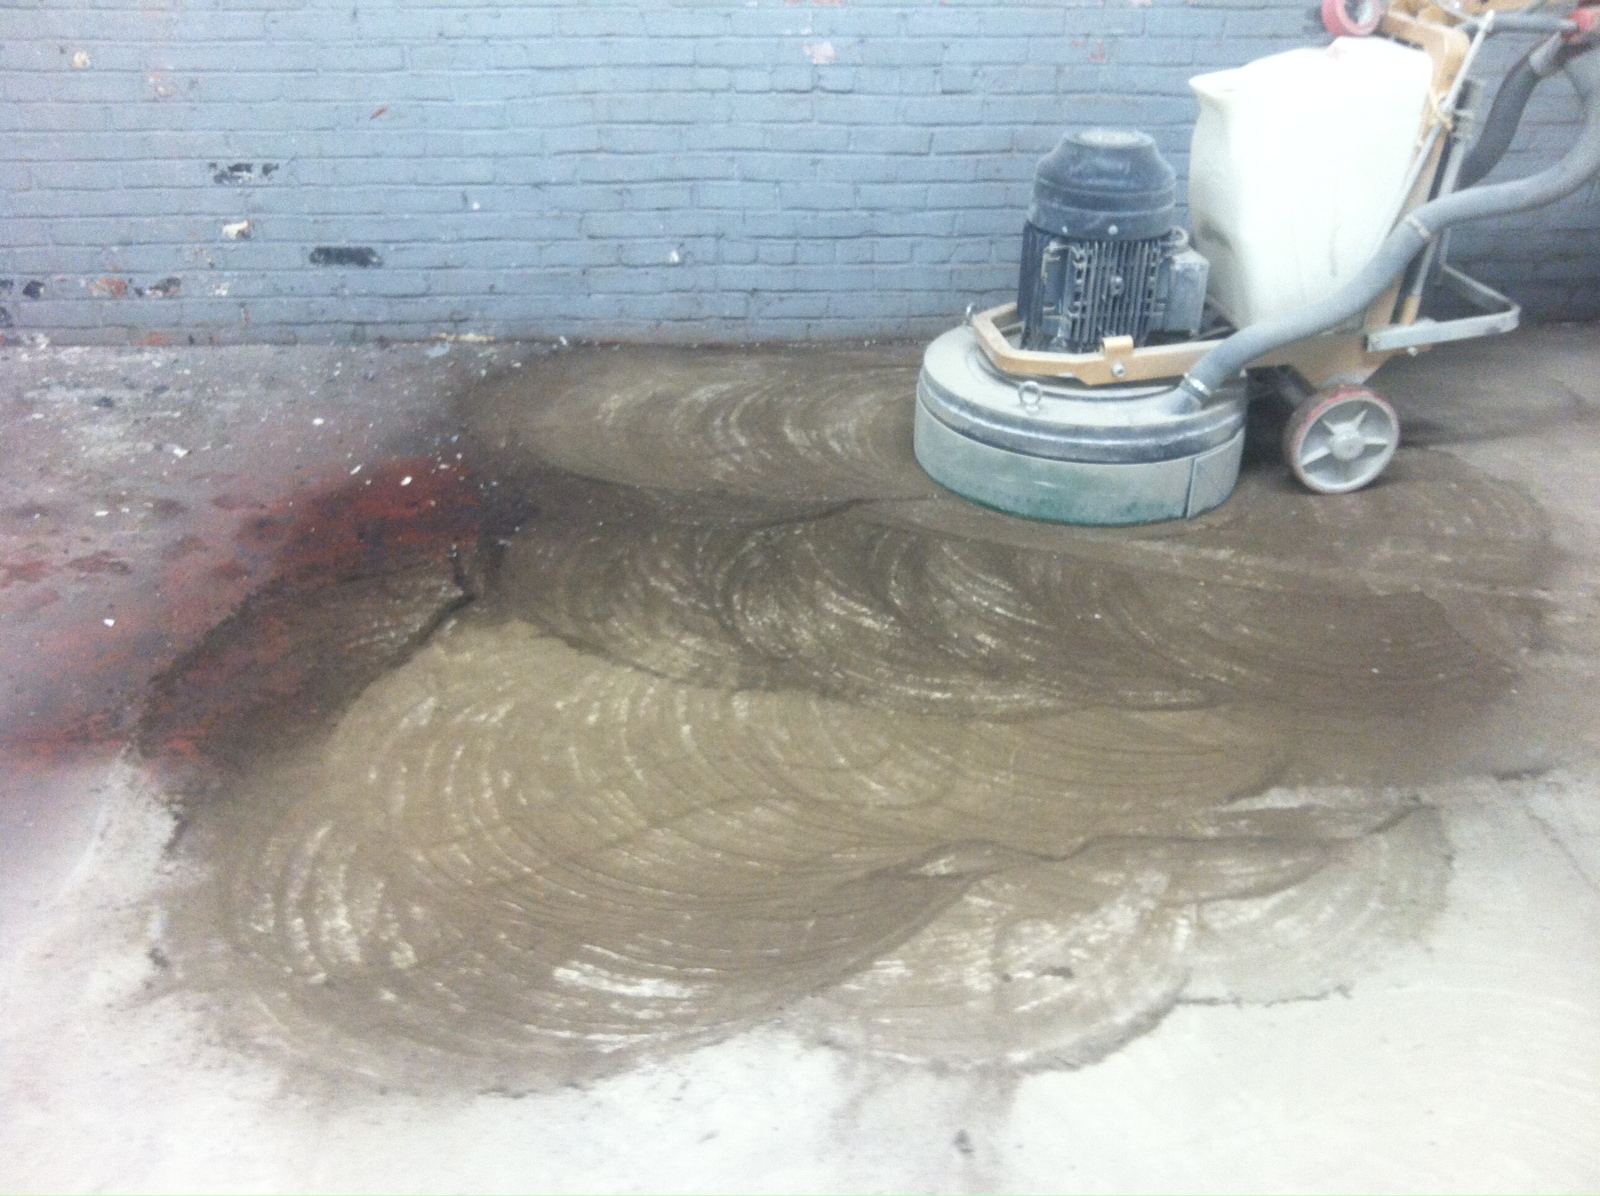
As you can see above even grinding will sometimes not even remove oil stains. Here the grinder is just spreading the oil all over the place. Lots of times the oil is so deeply embedded into the concrete  no matter what you do,  you will never get it all out. This is when you clean it up as best you can and then prime the floor with our patented epoxy oil primer and then epoxy paint over that.

If you think you were able to clean the floor of all the oil but are not sure cause the concrete may be a little darker where the stain was. Simply sprinkle some water on the spot and see if it beads up or turns a rainbow bluish color. If it doesn’t do either than you’re good to go. If it does either or both you can try cleaning again or go with the primer to be safe.