Info-Blog


HOW LONG WILL IT TAKE TO GET MY GARAGE EPOXY ORDER

When ordering epoxy coatings it’s never a good idea to wait to order so that it arrives a day or two before you plan on doing the job. Many times we get calls from customers who placed an order on a Tuesday or Wednesday expecting to do their project that weekend. If you are in the Tri State area in the Northeast that may be fine but if you are on the west coast or thereabouts then that will be an issue. We do our best to get orders out the door as fast as possible but you have to allow sufficient ground delivery time.

Only water based epoxies can be overnighted so none of our epoxies can be overnighted. When planning to epoxy paint your floor allow as much lead time as possible for several reasons. The epoxy has a shelf life of 1 year and the military topcoat has a shelf life of 6 months. So if you order ahead of time the product will be fine when you’re ready to apply. Also during busy season we tend to get back logged on epoxy orders and it could take a couple of extra days for the warehouse to ship out your epoxy, which is the case as of this righting. We have a sizable backlog of epoxy and deck coating orders. Severe weather can delay FedEx deliveries, or FedEx can lose or damage your order.
As a general guideline always allow a week for delivery, if you are on the west coast allow 7-8 business days to be safe. During summer months lead time for our Renew It Deck Coating can stretch out to two weeks due to demand. Ahead of major holidays you should allow an extra week for delivery.

So plan ahead and if you have an urgent situation gives a call at 866-532-3979 and will do the best we can to accommodate you.


PREPPING A BRAND NEW CONCRETE FLOOR AND CRACK REPAIR

One of the most frequent questions we get does I still need to do an acid etching on my floor if it’s brand new. The answer is Yes. New concrete floors need to be etched twice, in fact, to get all the curing residues cleared out of the pores, plus you need to wait 28 days prior to applying an epoxy coating to achieve that Polished concrete floors look you’re after. We recommend doing a strong etch first with some store-bought muriatic acid diluted in a 3:1 ratio with water. After scrubbing in the solution and letting it sit for 10 minutes, rinse off thoroughly and do the second etch with the etching solution provided in one of your ArmorGarage epoxy flooring kits in a 4:1 ratio. If your kit contained TSP powder scrub that in after the 10-minute wait and just prior to your final rinse off. This will neutralize the acid and bring your slab back to the proper PH to ensure the highest level of adhesion between the concrete and your epoxy coating. If your kit did not come with TSP, pick some up at any Hardware Store or Home Improvement store. 1 lb per every 750 square feet is sufficient.

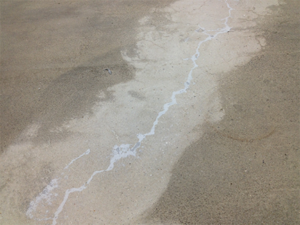
The second most common question is, I have some hairline cracks, do I need to fill them in? The answer is yes and no. If the cracks are truly cosmetic cracks at the surface, the epoxy will fill them in. However, even hairline cracks can sometimes run the depth of the slab making it difficult to fill in with your epoxy coating. Our coatings are very thick and they will fill in hairline cracks but be advised that if the cracks are 4 or more inches deep some settling can occur overnight as the epoxy cures. So the best course of action is to V out those hairline cracks with a grinding wheel on a small hand grinder. Then fill them in with a good quality concrete repair compound. Epoxy-based repair compounds are the best to use. They are the strongest and are the most compatible with epoxy coatings. Do not use any silicone-based products to repair cracks if you’re planning to paint your floor with any type of epoxy coating. Also, try to avoid any premixed type of products in a tub or plastic container. While these products are inexpensive and easy to use, you get what you pay for and they more often than not crack or chip out of the cracks or divots you applied them too which ruins the look of your new High Gloss epoxy floor. ArmorGarage has two great crack and divot repair compounds that are just as easy to use. We have an epoxy crack repair compound that you can mix, putty knife into your cracks and divots and then immediately epoxy paint over it. No need to wait for it to cure and it will never crack or chip apart. Use this product after the floor has been etched and dried. It’s good for cracks up to ¼” wide, divots up to 3/8″ deep and small pitted areas. Use our Crack & Joint Filling Compound for larger cracks, divots and for filling in holes. If you wanted to get a forklift rental, no worries. Once cured our repair compounds are rated A* for these duties so you’ll never have to worry about doing the repairs again.


FULL BROADCAST EPOXY FLOOR

SHOULD YOU DO A FULL BROADCAST EPOXY FLOOR?

The short answer is no unless you’re a professional and have done it many times before. Many customers call us and state they would like to do a full broadcast color flake epoxy floor for their garage or shop. Then after speaking with us for a few minutes they change their minds.

Epoxy Flooring ChipsIt may seem like a good idea when you read about it but doing it is much harder than it sounds. First off you need a tremendous amount of flakes, 70-75lbs of flakes for a typical 2 ½ car garage. Trying to do it with less chips and your floor will come out blotchy! Then you have the problem of applying so many flakes without them piling up in uneven lumps. If you’re not experienced in applying the color flakes they will end up in uneven layers and piles. Other companies trying to sell you on this will tell you that you can scrape the chips down. Again easier said than done and even after scraping and even sanding, the floor won’t look right.

So in addition to having your brand new epoxy floor not looking right, you’ll have to spend additional money to purchase a lot more topcoat. When you do a full broadcast, all those chips piled on top of each other create lots of nook and crannies. Those nooks and crannies have to be filled with topcoat, so plan on spending a lot more money on topcoat and time applying it in at least two coats or maybe three.

How do we know this? We know this from the thousands of floors we’ve done with our own guys. They have to know what they’re doing and even they screw it up every now and then. Which means they have to grind the floor off and start over. That’s why over 90% of the floors we do are not full broadcast. ArmorGarage offers two color flake floor options. The Armor Chip Garage Epoxy Flooring kit which provides you with about 75% chip coverage. Our Armor Granite kits provide you with 90% coverage. Both of these floors use the base epoxy color as one of the background colors. They both provide a beautiful finish that looks like you had a Pro do it for you even though you did it yourself for a fraction of the price. In fact, most customers don’t use all the color flakes we provide in each kit. We provide you the most color chips of any company so that you can apply the color chips until you like the pattern without having to worry about running out.

So why spend extra time and money and run the risk of having your floor not looking the way it should when you can get a gorgeous looking floor every time with our Armor Chip or Armor Granite Epoxy flooring kits.


Deck paint this spring

SPRING TIME = DECK TIME

Well it’s almost that time of the year again. The snow and ice will be melting off your decks and for many of you so will your deck coatings. If you don’t deal with this then the elements will damage your deck and you’ll need to get someone like Austin Fence & Deck – Repair & Replacement in to sort it. So you have a choice, do the same thing you do every year, strip and repaint or just repaint or reseal with that same clear sealer. All of which doesn’t work. So why not try something different?

ArmorGarage’s Renew It Coating is not a paint, stain or sealer. It’s a super thick cementitious coating that will stick to your concrete or wood decks like glue and stay looking new for many years. Off the shelf paints, stains and sealers are just not hearty enough to last as long as you want and need them to.

So strip off whatever you have on your deck now or should we say strip off whatever is left of whatever you have on your deck now. Then apply our deck primer and let that dry. Next apply two thick coats of Renew It with our special rollers and see how beautiful your deck can look and stay looking that way.

The key to good results is to clean your deck really good, you want the primer going directly on and into the deck surface. Then make sure the temperature will be above 50 degrees for the next 72 hours and no rain for the next 24 hours. Then roll on one coat and let dry for about 4 hours till hard to the touch. Then roll on the second coat. Don’t try to stretch it out, Renew It goes on really thick. That’s how in fills in cracks and holes. So it coats and repairs your deck surface at the same time. You should have approximately an 1/8″ costing on the surface. Any rotted boards should be replaced. You should replace them with untreated boards and give them a rough sanding prior to priming. This can be quite a long process, but it’s worth it. There are a number of things to consider when fixing your timber deck up, so follow this guide on sanding a timber deck. By following this guide, you’ll be sure to have the perfect decking you desire in no time.

So give Renew It a try and take next spring off from deck chores!


Before you buy an epoxy floor coating

KNOW WHAT YOU’RE BUYING

Whenever you are buying anything it helps to know what exactly it is you’re buying. By that, we mean not simply knowing you’re buying a certain product such as a car, a steak, or an epoxy floor coating. A question that we get asked a lot is why is your epoxy coatings or garage flooring is more expensive than the other coatings and flooring products out there. Of course, you want the best Garage Flooring NH but you also should want it for the best price too.

Garage Floor Epoxy

To answer that the best way we can; lets use the analogy with the items above such as the car and a piece of steak. If you’re car shopping you can ask why is a Mercedes so much more than a Toyota? Well as we all know the Mercedes is a higher quality vehicle with much more expensive components and options. But why is a Mercedes S class so much more than a C class. Well again it’s a higher quality car, it’s bigger, with a bigger engine, more horsepower and has a lot more expensive options. Now lets take a piece of steak as an example. You can buy a nice Ribeye for about 9 bucks a pound and you can buy one for 29 bucks a pound. Why the difference, they’re both steaks? People tend to think that way with their epoxy flooring and garage flooring purchases. Why is one garage tile or epoxy floor paint so much more than the next one, they’re both tiles and paint. Well with the steaks, the $9.00 a pound steak is probably Choice grade, the $29.00 a pound steak is Prime grade, big difference. The more expensive steak may also be Dry Aged and Hormone free. We could go on but I think you get the picture.

The point we are trying to make here is that knowing the details about the products you want to purchase will give you a better understanding about the price levels of each product. For instance, before you buy an epoxy floor coating you should know whether it’s water based or not. If you buy an epoxy that’s water based you can be paying for water that comprises up to 50% of the product versus a high quality epoxy that is 100% epoxy. Lets say the 100% solid epoxy is like the Mercedes, now you have a C class epoxy and an S class epoxy. What’s the difference, they’re both 100%? One way to know is does the epoxy come with a true topcoat that has a hardened finish and not just a clear version of the unhardened epoxy? A true Topcoat is a hardened epoxy. To find out, check the abrasion rating, the lower the mg loss rating the better the coating. An abrasion rating over 20 means the Topcoat or epoxy is not hardened and it will not last. Check the impact rating, check the thickness of the coating. Thinner coating will obviously wear out faster than thicker coatings especially if they do not have a hardened finish with an abrasion rating of 20mgs or less. These are critical things to know. Knowing these facts will make sure you are buying an epoxy that will be up to the traffic load on your floor. It will also make it easier for you to make the purchase knowing that you are getting a much higher quality product.

The same can be said for garage tiles, some tiles are hollow core and made from recycled soda bottles versus our tiles that our solid high quality PVC. Again, a big difference. A hollow tile weighs less than a pound of the cheapest quality plastic while our tiles weight 4.5 lbs each of high grade PVC. So there is a perfectly good reason for the price differential just as there was for the steaks and the Mercedes. You just need to know there’s a difference and what that difference actually is.

So before you buy, check the specification, ask questions and make sure you know what you are buying and that you are satisfied with the level of quality you are purchasing.


Quality Epoxy vs Cheap Epoxy

WHEN IS AN EPOXY BARGAIN NOT A BARGAIN?

Everyone likes to get a good deal and save money. But sometimes a good deal is not really a good deal at all. That’s most often the case when dealing with epoxy floor coatings. There are many different types and prices range from $75.00 for a Home Improvement store kit to our kits that are north of $500.00. What is the difference? And how can you tell high-quality epoxy, like the epoxy at Epoxy Flooring Sugar Land, and low-quality epoxy that’s not going to help your floor at all?

Well, first there are epoxies made with different types of bases. There’s water based, solvent based and solids based. With solids based epoxies being the best. Then there’s different classes of epoxies such as Aliphatic, cycloaliphatic, polyaspartic and polycuramine.
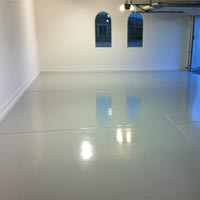
Let’s talk about bases first. Water based epoxies are your lowest quality epoxies since about 50% of the epoxy is water. So that as the epoxy dries the water evaporates out and you’re left with only about 50% of paint material on the floor. In addition to that, water based epoxies have low abrasion resistance, poor adhesion and will wear off your floor very quickly. The same applies to most solvent based epoxies, they’re just not good quality coatings. Solids based epoxies are the most expensive to make and when you apply it to your floor you get whatever percentage of solids in the epoxy onto your floor. For instance, if you apply a 100% solids epoxy, you get 100% of the epoxy onto your floor. If you apply a 90% solids epoxy, you lose 10% of the product to evaporation. Our Garage Floor epoxies are 100% solids.

Now let’s talk about the different classes of epoxy. You will hear and read all sorts of things that this epoxy is X times stronger and this epoxy is superior to standard epoxies, etc. Take it from somebody whose made and used every type of epoxy out there, Aliphatic is the best tried and true type of epoxy. A 100% solids Aliphatic epoxy combined with a Urethane epoxy topcoat is the best floor coating you can use on your floor. Cycloaliphatic epoxies, even if they’re 100% solids are no match. They’re not as abrasion resistant, not as thick and are not UV stable! Some of our competition try to pass off their epoxy in a clear version as a topcoat. Don’t be fooled, you are just wasting your time and money. Polycuramine epoxies claim to be 20 times stronger than epoxy but we never see any specifications as to what and where they are stronger. The fact is that these well marketed epoxy kits are only 3.6 Mils thick as opposed to our Armor Chip & Armor Granite epoxy flooring that are on average 20 Mils thick. The polycuramine kits are not UV rated and do not provide the stated coverage. So you have to buy a lot of extra material to finish your floor and then the colors don’t match cause you have different batches. So the bargain you thought you were getting is now costing you almost as much as an ArmorGarage epoxy floor and it’s nowhere as durable and it looks terrible. So now if you want your floor to look right you will end up spending much more money and time than if you just bought an ArmorGarage kit in the first place.

Polyaspartic epoxies are good in the right applications, they cure very fast but are thin mil and are difficult to work with. If you need a polyaspartic epoxy we recommend you consult with one of our experts.

So in sum, when dealing with water based, cycloaliphatic and polycuramine epoxies they may all seem like a good deal but at the end of the day you will be disappointed. You will have curing issues, color issues, coverage issues and most of all they won’t last anywhere as long as you thought they would.

Saving a few dollars should not be your main goal when doing and epoxy floor job. With epoxy coatings you really do get what you pay for!

Wait before you park on new epoxy floor

HOW LONG DO I HAVE TO WAIT BEFORE I PARK MY CAR ON MY NEW EPOXY FLOOR?

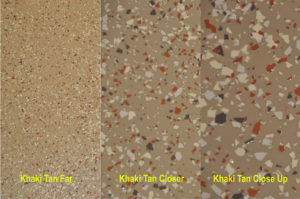
epoxy flooringThis is a common question that has a few different answers. It depends on what type of vehicle you will be parking on your new epoxy floor and what type of epoxy paint you used. You normally have to wait a few days before parking any vehicle on a newly coated floor. The reason being is that although the epoxy will be dry to the touch in about 8-10 hours the chemical curing process is still going on.

Technically speaking the molecular cross linking is still occurring and as time goes on the cross links get tighter which means the coating is getting stronger and harder.

Depending on temperature and humidity we recommend you keep standard size vehicles off your floor for at least 3 days. Larger vehicles and SUVs should stay off 4 days. Heavy commercial vehicles should stay off for 5 days.

If downtime is critical we do make our Ultra Fast Drying military grade epoxy flooring system that lets you paint and be back in service, the next day! Although this coating is costlier to purchase, it can save you considerable sums of money from not having to shut your operations down for more than 24 hours.

So depending on what your needs are, what kind of vehicle you have, what the temperature is and what kind of epoxy you’ve applied it will all play a factor in when you can start driving a vehicle over your newly epoxy painted floor. If you can wait an extra day, it’s better to be safe than sorry. You can also always contact us for our advice when it comes to questions about your floor.


Multi-Color Epoxy Flooring DIY

HOW TO DO A MULTI-COLOR EPOXY FLOOR

Girvan P. wanted a two color floor with a border. This is how he did it. Once the floor is properly prepped by etch acid etching or grinding and or both.  You apply the first base coat.  In Girvan’s case he wanted a solid color so we went with our Armor II commercial system. So he did the whole floor in Light Gray and then when that dried the next day he taped off the rectangles and applied the Dark Gray epoxy inside the tape lines. He let that dry and he then taped off the border area and lightly sanded the epoxy floor border area inside the taped area.  This was because the base coat had now been curing for more than 24 hours.  Anytime an epoxy coating cures for more than 24 hours you want to lightly sand it to give the epoxy coating going over it a rough surface to adhere too.  So once the border area was sanded he applied the Yellow epoxy coat.
Now he sanded the entire floor with a block & pole sander using 100 grit paper.  Got off all the dust and sanding residue and applied a clear topcoat over the entire floor.  He now has a beautiful two color epoxy floor with high performance commercial coating that will last many years to come.

It’s easier than it sounds to do these types of floors and you can use any colors or as many colors as you like. We at ArmorGarage can help you layout your floor and guide you on the best way to do it.  Like we did with Girvan.  Here’s what Girvan had to say in an email to us.

“Hi Jim –
New garage floor successfully installed (see pic)- it looks fabulous! This despite the onset of winter – we managed to keep the heat up sufficiently. Quantities were just right – half a can of clear coat left for touch ups.
Very many thanks for all your help
Girvan P.
Ottawa, Canada”


Fill in concrete cracks

WHEN AND HOW TO FILL IN CRACKS

We get asked all the time when should cracks be repaired both size wise and timing wise as far as etching and coating the floor. Lets start with when you should repair any cracks or divots in your concrete floor. If you’re using our Ready Coat Crack Repair, you would do the repairs after you have cleaned and etched your floor and the floor has dried. You would then simply mix the Part A & Part B together to form a sort of a putty and then you would putty knife it into any cracks or divots. Let it sit a minute or two and then you can apply our epoxy right over it without having to wait for the putty to cure. This saves you a whole day or more waiting for your repair compound to cure.

For larger cracks and holes in your concrete slab we have a Crack & Joint compound. This Part A & B get mixed together and then you add in approximately 50lbs of playground sand per gallon of Mortar Liquids and mix together until it becomes a grout consistency. Then you trowel into the repair areas, scrape flat and let cure for at least 24 hrs. If some of your repairs came out a little rough, you can hand grind them smooth. Use this product prior to your etching. epoxy-crack-filler

When do cracks need to be filled in? Our epoxies are thick and can fill in surface cracks. The trick is to know if the crack is at the surface or if it runs the depth of the slab. Even hairline cracks that run the depth of the slab will consume a lot of epoxy to fill them up. Best to use one of our crack compounds to fill them in. For small cracks you can run a grinder wheel down the crack to V out to make it easier to apply the repair compound into them.

For Control Joints and Expansion Joints use the Epoxy Crack & Joint Compound with the sand to fill in. Please note we always recommend not filling them in. Once you fill these in you run the risk of getting a crack down the middle of your brand new high gloss epoxy floor. Especially on newer floors. Although these joints look unsightly now and are garbage collectors, keep in mind that once you’re done epoxying the floor the joints will actually make the floor look better and since the joints are now epoxy painted no dust and dirt will stick inside them. So, unless the control or expansion joints make you physically ill at the sight of them, don’t fill them in, just finish them inside and out with the epoxy.

Check all of our concrete crack repair products at www.armorgarage.com


Epoxy paint your floor in sections

HOW TO EPOXY PAINT YOUR FLOOR IN SECTIONS

Sometimes you have too much stuff on your floor to completely clear out or maybe you just can’t stop what you’re doing business wise on the whole floor at the same time. So you need to do the floor in sections so you can move your stuff around and or keep your business running while you redo your floor with an epoxy flooring coat.

Garage Floor EpoxyOnce the floor is properly prepared (see how to prepare your floor for epoxy coating) you would apply a good duct tape line to section off the floor. Do not use painters tape since our epoxy is too thick for that. Apply the first epoxy floor coat up to the tape line and let dry. Then apply the second coat but stay back 6-12” from the tape line. If doing a third coat as in the case of our Military Epoxy System, stay back 12” from the edge of the second coat. Thus creating a step effect with the floor epoxy.

Then carefully remove the tape, razor cutting the edge will most likely be needed. Before applying the first coat of the next section, lightly sand the first 6-12” strip of the first section to rough up. Then apply the epoxy to the second section and lightly overlap onto that sanded strip of the first section. For the second coat, you will lightly sand the strip of the second coat from the first section and lightly overlap the new section over that. Do the same if doing a third coat. The reason you need to sand those stripes is that after 24 hours the epoxy pores start closing and may affect the bonding of the overlapping epoxy.

Follow this method and the epoxies will all blend into one monolithic coating making your floor look like you did it all in one shot.