FULL BROADCAST EPOXY FLOOR
SHOULD YOU DO A FULL BROADCAST EPOXY FLOOR?
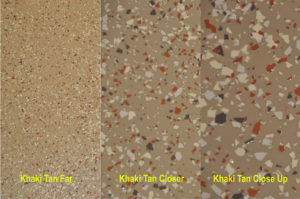
The short answer is no unless you’re a professional and have done it many times before. Many customers call us and state they would like to do a full broadcast color flake epoxy floor for their garage or shop. Then after speaking with us for a few minutes they change their minds.
 It may seem like a good idea when you read about it but doing it is much harder than it sounds. First off you need a tremendous amount of flakes, 70-75lbs of flakes for a typical 2 ½ car garage. Trying to do it with less chips and your floor will come out blotchy! Then you have the problem of applying so many flakes without them piling up in uneven lumps. If you’re not experienced in applying the color flakes they will end up in uneven layers and piles. Other companies trying to sell you on this will tell you that you can scrape the chips down. Again easier said than done and even after scraping and even sanding, the floor won’t look right.
So in addition to having your brand new epoxy floor not looking right, you’ll have to spend additional money to purchase a lot more topcoat. When you do a full broadcast, all those chips piled on top of each other create lots of nook and crannies. Those nooks and crannies have to be filled with topcoat, so plan on spending a lot more money on topcoat and time applying it in at least two coats or maybe three.
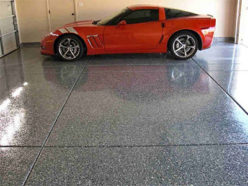
How do we know this? We know this from the thousands of floors we’ve done with our own guys. They have to know what they’re doing and even they screw it up every now and then. Which means they have to grind the floor off and start over. That’s why over 90% of the floors we do are not full broadcast. ArmorGarage offers two color flake floor options. The Armor Chip Garage Epoxy Flooring kit which provides you with about 75% chip coverage. Our Armor Granite kits provide you with 90% coverage. Both of these floors use the base epoxy color as one of the background colors. They both provide a beautiful finish that looks like you had a Pro do it for you even though you did it yourself for a fraction of the price. In fact, most customers don’t use all the color flakes we provide in each kit. We provide you the most color chips of any company so that you can apply the color chips until you like the pattern without having to worry about running out.
So why spend extra time and money and run the risk of having your floor not looking the way it should when you can get a gorgeous looking floor every time with our Armor Chip or Armor Granite Epoxy flooring kits.

 This is a common question that has a few different answers. It depends on what type of vehicle you will be parking on your
  Girvan P. wanted a two color floor with a border. This is how he did it. Once the floor is properly prepped by etch acid etching or grinding and or both. You apply the first base coat. In Girvan’s case he wanted a solid color so we went with our Armor II commercial system. So he did the whole floor in Light Gray and then when that dried the next day he taped off the rectangles and applied the Dark Gray epoxy inside the tape lines. He let that dry and he then taped off the border area and lightly sanded the epoxy floor border area inside the taped area. This was because the base coat had now been curing for more than 24 hours. Anytime an