armorgarage


Why You Should Epoxy Your Concrete Floor

Epoxy Your Concrete Floor

If you’ve just gotten Decorative Concrete Solutions – Decorative Concrete Garage Floors, you’re going to want to protect your floor. This is especially important if you have decided to build your own garage and have laid your concrete garage foundation. While there is still a way to go before you have a finished garage, You might want some tips on what you may need once your garage is finished. The question asked is why should I spend money to put an epoxy coating on my concrete floor in my garage or business. Well there are a few good reasons.

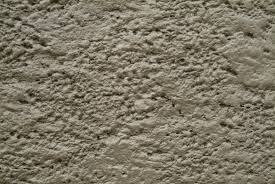
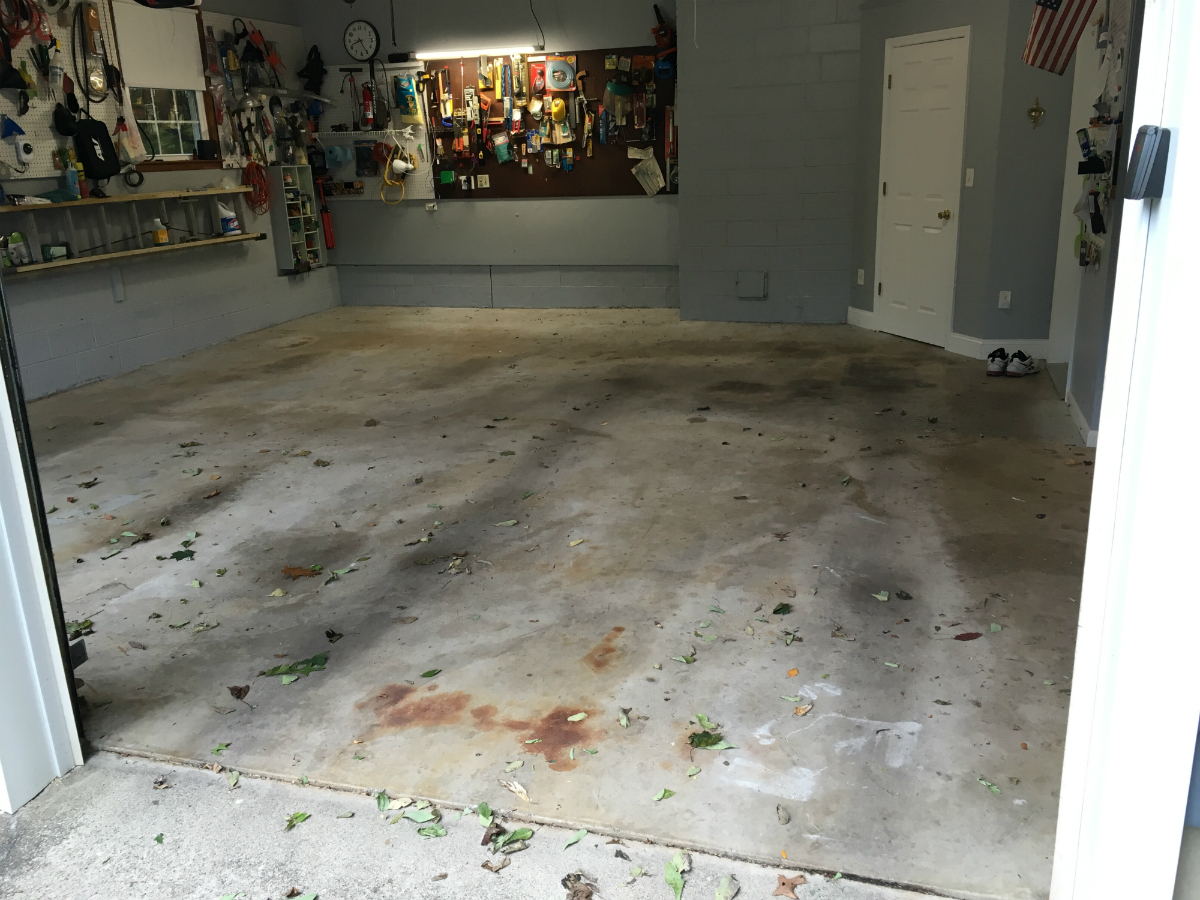
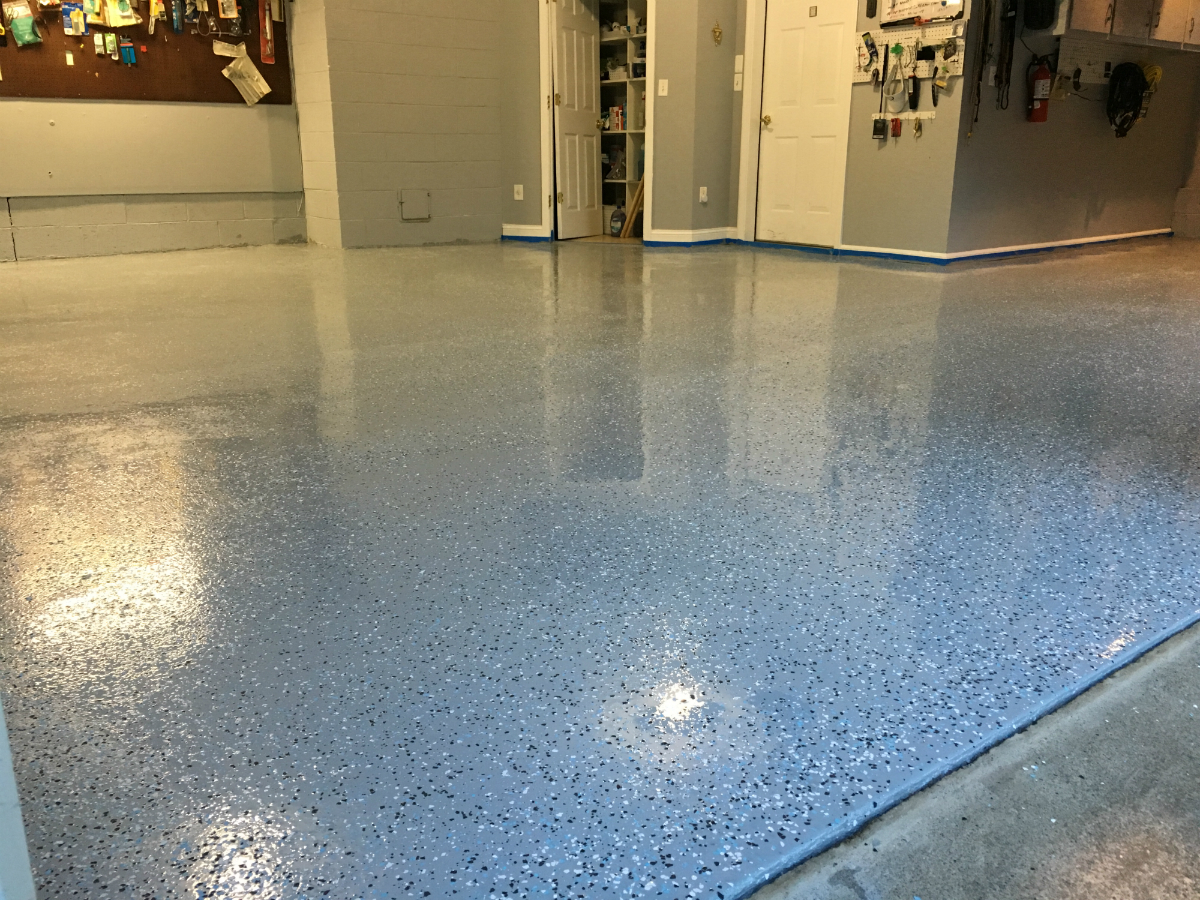
One it will take your floor from looking like this

Epoxy Concrete floor

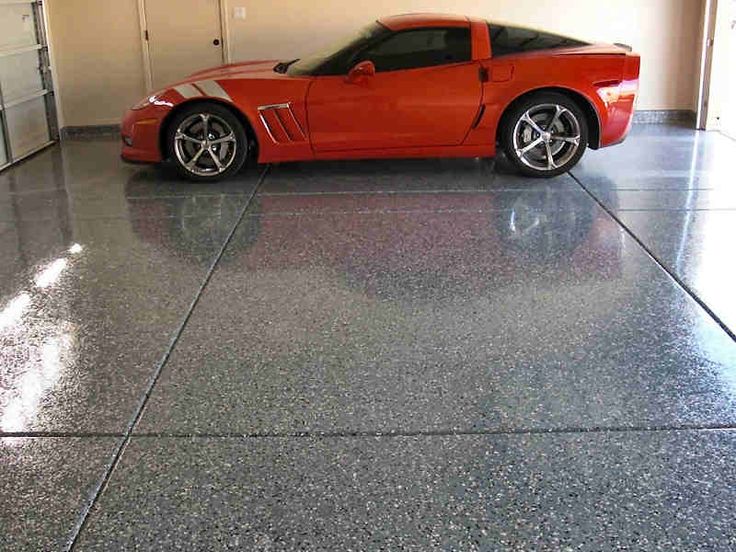
To looking like this

Epoxy Concrete floor

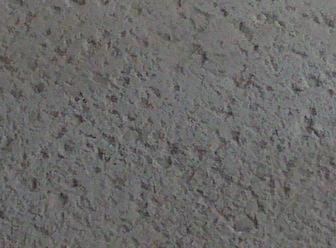
We would say that’s a pretty good reason right there. The above is our Armor Chip garage epoxy kit which can be used residential or commercially. Another reason for epoxying your floor is for protection to prevent your floor from looking like these two images.

pitted floor Pitting Concrete

This is the beginning of your concrete failing from abrasion, salt corrosion and age. If you do nothing, eventually you will need to do an expensive slurry type resurfacing or complete replacement. If you have rebar in the floor it will lead to rebar corrosion and a very expensive restoration project. Much better to apply a high quality epoxy floor coating. It will enhance the look of your floor while protecting it from wear, tear, and corrosion. You could also look at different concrete services such as Concrete polishing, polishing concrete can create a nice looking finish on your floor, as well as protecting the material underneath, this can decrease the risk of damage, and increase the resistance against foot traffic as well as other potentially damaging factors such as cars or bikes.

If your floor has gotten pitted to this point. We would first do a good acid etch and TSP rinse. If you can do a diamond grind, even better but we would still do a TSP rinse to get the floor to the right PH. Then you’ll need to put down a good quality epoxy primer followed by a layer of extra thick 100% solids epoxy like our Ultra Epoxy with a flat squeegee. You want to scrape the squeegee along the surface leaving little to no epoxy on the surface of the primer. The main purpose of the flat squeegee is to fill in the pits. Once that dries then you can apply a second layer of epoxy to the floor. Then as always you must apply a proper urethane epoxy topcoat.

To Full Broadcast An Epoxy Floor Coating Or Not

Full Broadcast An Epoxy Floor Coating

When doing an epoxy flooring job with color flakes you have the choice of how many pounds to broadcast into the epoxy. Some epoxy kits come with a ridiculously small amount of chips that makes your floor look like it got the measles. We offer two kits Armor Chip & Armor Granite. Armor Chip has 8lbs of color chips for a medium chip coverage, about 75% and Armor Granite has 20lbs of chips for a heavy chip coverage about 90%.

How much you do is up to your personal taste. We give plenty of chips so you can toss them into the epoxy until your eye tells you to stop cause you like the way it looks without worrying about running out of chips at the end. If you start out with insufficient amount of chips you will be forced to stretch them at the end and your floor will have a very obvious uneven chip pattern.

What we want to point out to you in this article is that although a full broadcast system looks great it is much more difficult to do. If you’ve never done it before we advise against you doing it. It is very difficult to get the chips to come out looking right, it takes a LOT more chips to do the job right and it take a lot more topcoat to cover the chips because you have to fill in all the nooks and crannies. It takes experience to get a full broadcast floor to look  professional. Plus it adds significant cost in the amount of chips and extra clear topcoat that you will need.  This is the reason why we offer our Armor Granite kit, you get the benefit of that beautiful granite look without the difficulties and cost of a full broadcast floor.

So if you want a full broadcast look, hire a pro to do it for you. If you like the way the floor looks below then you can do it yourself with one of our epoxy kits. We don’t know about you but we think it doesn’t get much better than this floor which happens to be an Armor Granite kit.

CHARCOLE

PS: You can still purchase our epoxy kits and have someone experienced apply it for you if your heart is set on full broadcast. Just call us so we can order the right amount of extra chips and topcoat for your floor size.


Floor Leveling

Floor Leveling before Floor Epoxy

When doing a slurry to level out an uneven floor it’s critical that the preparation is done properly. It doesn’t matter if you are going to apply an epoxy floor coating over it, put down some type of flooring or just leave it plain. The concrete must be profiled properly so that the slurry will bond to it. We recommend a shot blasting. It’s cheaper than grinding and it leaves a rougher surface.

Also use a good quality product such as Aedex-15 or CMP. These are commercial grade products that will last you a lot longer than the bargain stuff you can buy at your local Home Improvement store.

If you are applying an epoxy coating always check with the manufacturer on the wait time after curing. The cure time before you can apply any coating varies greatly between products. Also make sure the product you use is rated for the thickness you need to float the slurry at and that it can handle the intended traffic load at that thickness.

Most times the slurry is applied with a Gage rake which is simply an adjustable flat blade on rollers. You set the blade for the desired thickness and you roll the rake over the slurry. It spreads the slurry out at the desired thickness.

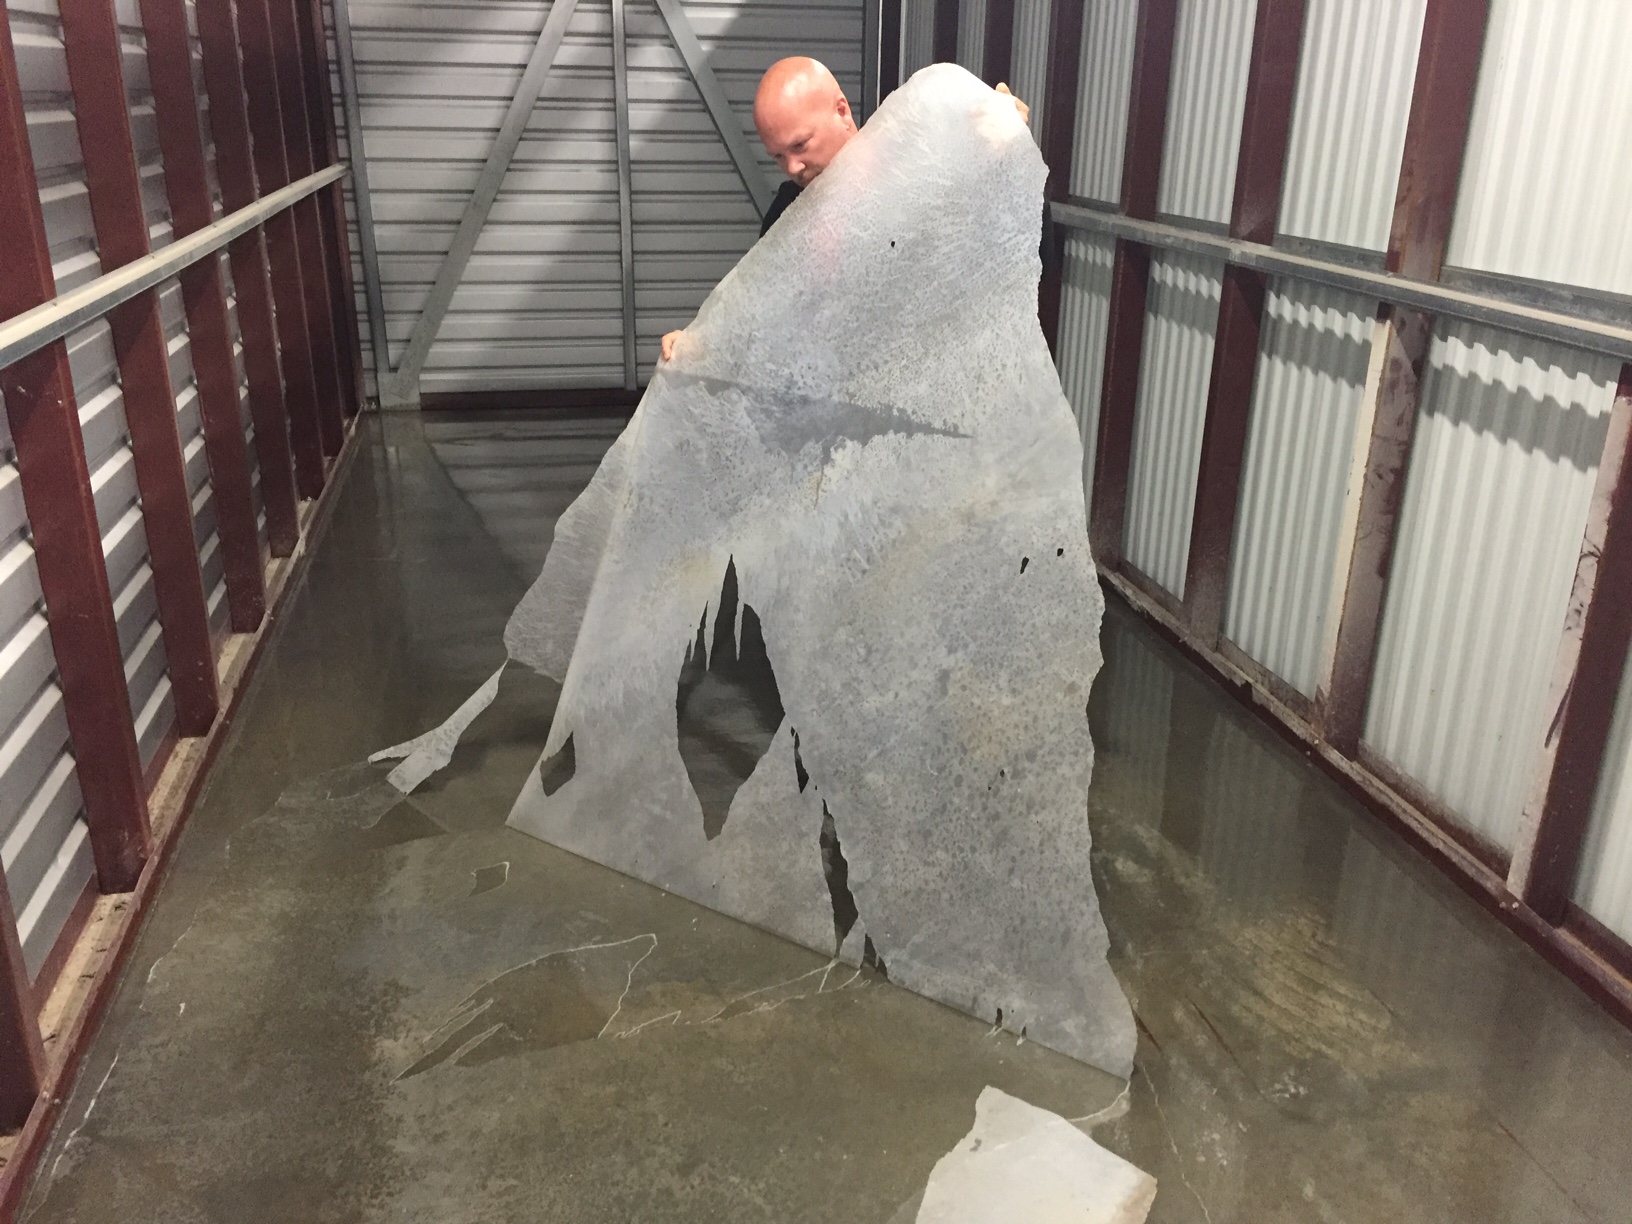
Done right slurries can save a floor that is in really bad shape, they are not just for leveling. But done wrong and you’ll end up like this:

Floor Epoxy

For less drastic floor repairs visit our concrete repair page for a selection of products that can repair cracks, divots and holes in your slab.


Epoxy Coatings & Moisture

Epoxy coating to a floor that gets flooded

We get asked a lot if it’s ok to apply an epoxy coating to a floor that gets flooded every now and then. The answer is yes if the water is coming from above the slab such as through the walls or from under doors. You need to make sure the floor is completely dry and once the epoxy has cured it is completely impervious to water. So as long as the water is not coming up through the slab it’s ok to epoxy a concrete floor.

If the moisture is coming up through the slab then it’s a matter of how much. If you are getting just some damp spots in the floor then it’s safe to epoxy it with the proper coatings. If you are getting puddles on the floor from water coming up then it’s probably not a good idea that you epoxy your floor. At least not as a DIY project. That type of scenario is better left to a professional that specializes in this type of work.

If your floor is just getting damp spots then you can use a moisture sealing primer to seal out the moisture and then epoxy over that. Problem is most moisture sealers are typical sealers in that they don’t like anything sticking to them. We have a Wet Basement Epoxy Kit that you can apply on any floor that comes with a moisture sealing epoxy primer and our 100% solids two part epoxy. You can add color flakes to this and a clear protective topcoat.

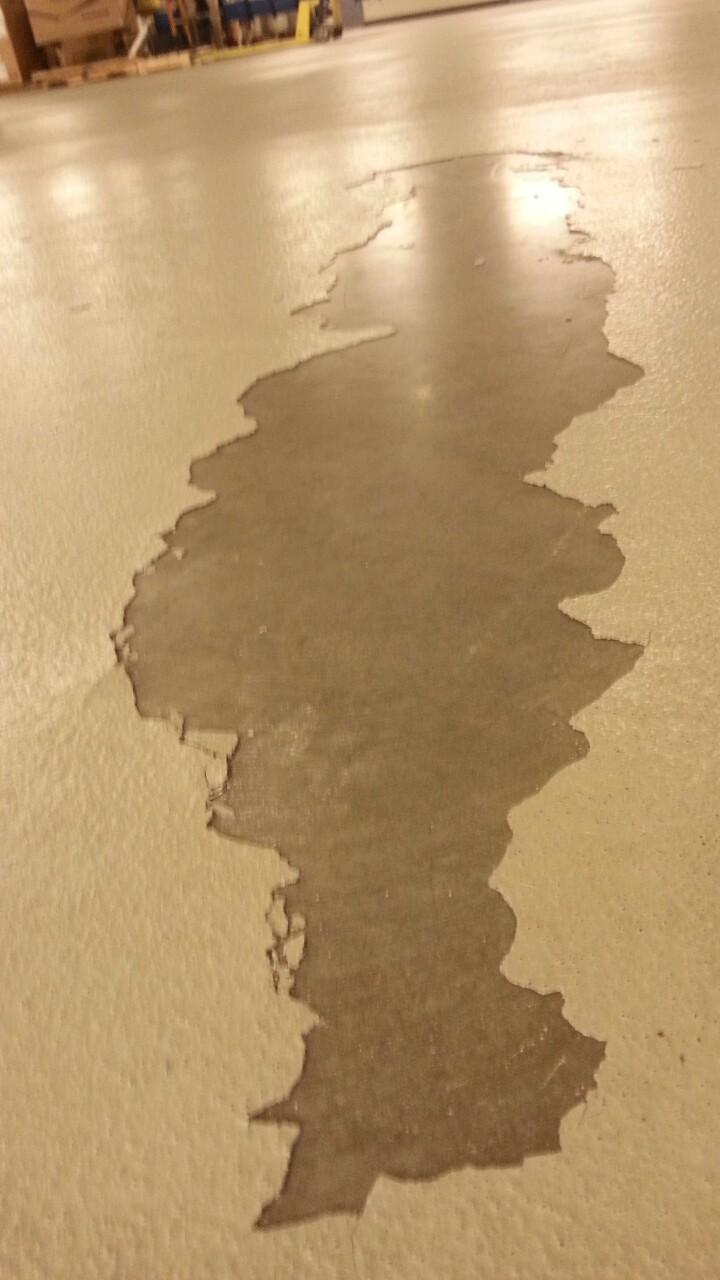
Here’s what happens when you don’t use a moisture primer or you use one that is not compatible with the epoxy you are using. If you’re wanting to find other sealants for any other moisture leaks within your garage or home, then you’ll more than likely be able to find the type of sealant you’re needing here, or with a simple internet search if you know what you’re looking for!

MOISTURE1


Garage Tiles Facts & Fiction Part 2

Garage Tiles Facts

Do you need to order a whole tile as a sample to get a good feel for the tile? Absolutely no. We send out a small piece of the tile and as soon as you put it into your hand you can tell that our tiles are head and shoulders above the other popular tiles that send you a full a tile as a sample. If you’re using cheap recycled materials and the tiles cost you only a dollar to make or import from China then yea you can send out free full tiles. Our tiles are very costly to make cause of the high quality PVC we use plus they weight 4.5 lbs each as compared to a few ounces of a typical Polypropylene tile. So shipping our tile is much more expensive. Our tiles are very competitively priced for what you are getting. Meaning are margins are very tight as compared to tiles that cost a dollar to manufacture and sell for not much less than our 100% solid PVC tiles.

So don’t get fooled or impressed by anyone just because they sent you a full tile. Instead concentrate on what it is you’re getting as a tile. Is it hollow, is it solid, is it PVC or Polypropylene, does the tile have full perimeter  locking tabs or just a few Peg and Loop connectors on each side. Big difference! Peg & Loop connections stink. They make popping noises as your car drives over them, they break off as you install them, they break off if your floor is the slightest bit un-level(and what floor is 100% level?), they stretch and start to split apart creating large unsightly seams that get filled with all sorts of crud that is next to impossible to clean out.

So instead of worrying about the sample you get focus on the quality difference and figure out which tile is going to look new 5, 10 or 20 years from the day you install them. It won’t be a hollow polypropylene tile with Peg & Loop connections.


Epoxy Coating Over An Oil Stained Floor

Epoxy Coating Over An Oil Stained Floor

If your floor is full of oil stains you need to be very careful on how you prep it before applying any epoxy coating to it. Oil stains are at best difficult to get out and in most cases can be downright impossible to remove. If you have light oil stains you can use our Oil & Grease Remover or similar quality product. You can use Liquid Tide scrubbed in with some Muratic Acid. If either or both those methods fail then you need to use our proprietary Oil Stain Primer . It is specially engineered to actually bond with oil on the molecular level. It is the only way you will get epoxy to stick to your floor. Also if you have stains all over the place we recommend that you prime the whole floor so that you don’t get different color shading in the epoxy since the primer is very dark in color.

Epoxy Coating

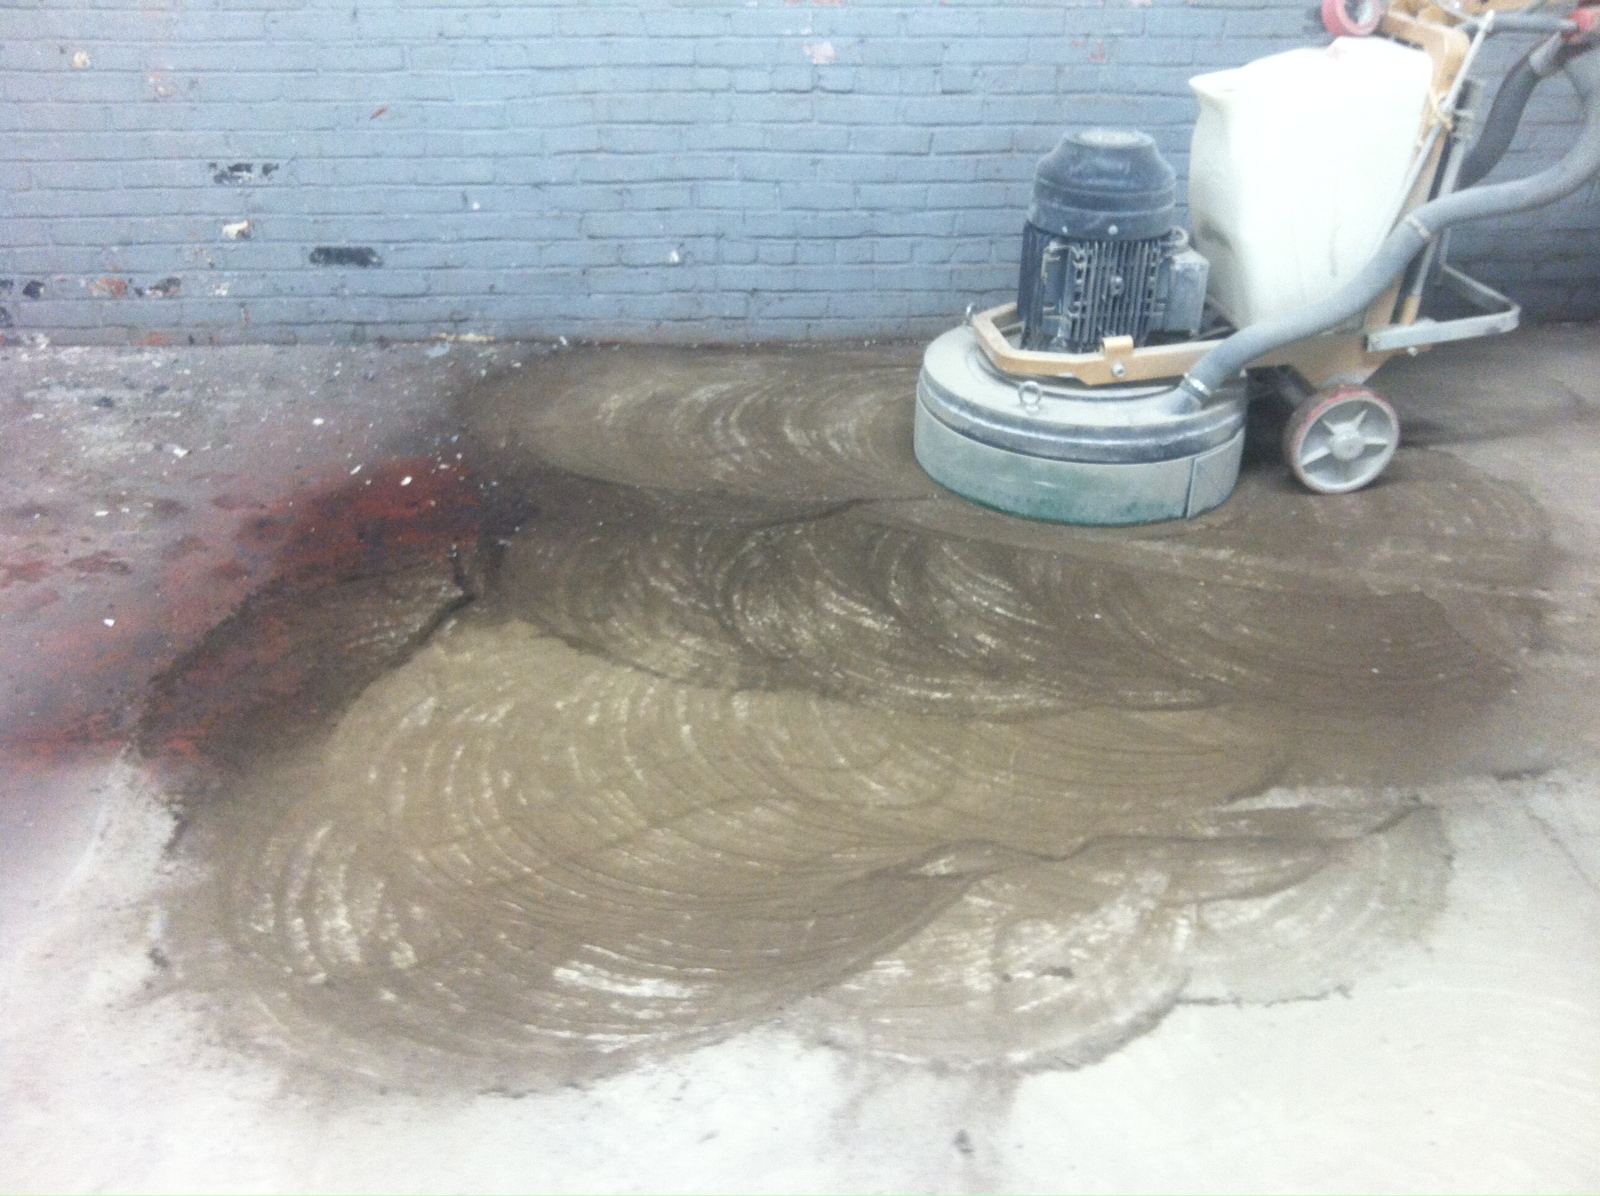
As you can see above even grinding will sometimes not even remove oil stains. Here the grinder is just spreading the oil all over the place. Lots of times the oil is so deeply embedded into the concrete  no matter what you do,  you will never get it all out. This is when you clean it up as best you can and then prime the floor with our patented epoxy oil primer and then epoxy paint over that.

If you think you were able to clean the floor of all the oil but are not sure cause the concrete may be a little darker where the stain was. Simply sprinkle some water on the spot and see if it beads up or turns a rainbow bluish color. If it doesn’t do either than you’re good to go. If it does either or both you can try cleaning again or go with the primer to be safe.


Need To Know Facts About Garage Floor Tiles

Facts About Garage Floor Tiles

There seems to be as much misinformation about garage tiles as there are different types of tiles. We’ll go over a couple of facts here and let you decide on what your money is best spent on. You already have to think about the maintenance of other garage elements like a Garage Door Opener Repair so getting hassle-free flooring should be a priority.

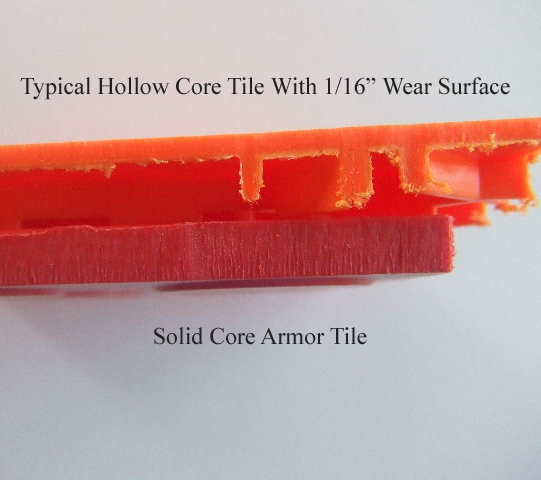
Retiling your garage shouldn’t cause too much hassle, but you will need to make sure you have the right kind of tiles to do so. You’ll find then when you decide to retile your detached garage, you’ll be overwhelmed with the options available. The main thing we need to discuss is that there are two main types of tiles, hollow core tiles, and solid core tiles. Hollow-core are exactly what they sound like. They have a thin wear surface and are completely hollow underneath versus a solid tile that has no hollow spaces. This image clearly shows the difference.

Garage Tiles

As you can see the top tile is hollow while the bottom tile is completely solid. It’s easy to figure out which is the stronger tile and which one will last longer.

Next is the different types of material the tiles are made from. The first thing we would strongly suggest is you find out where the tiles you are considering to buy are made. Lots of tiles on the market are coming from China. They look similar to our tiles but are very different. First, you have no idea what they are made of and what type of filler products are in them. Think of Chinese drywall. Our Garage Tiles are made right here in the USA . Plus we only use materials originating in the USA. So beware of tiles that are made here but use Chinese materials.

So leaving out the Chinese factor, the two main materials used are Polypropylene and PVC. Polypropylene tiles are basically recycled soda and water bottles. Very cheap material otherwise known as ABS plastic. When home builders want to cut corners they have their plumbers install ABS plastic instead of PVC. PVC is a far superior material and correspondingly more expensive. So if you are comparing PVC tiles to Polypropylene tiles it’s the proverbial apples to oranges comparison. You can double that comparison when comparing hollow polypropylene tiles to solid PVC tiles to an apples and crackers comparison.

Another myth is that if you drive smaller vehicles and only go straight in and out of your garage you don’t need a quality tile. We say that’s nonsense. In anything in life you buy, you get what you pay for. Those polypropylene tiles you think you saved money on will end up costing you more than you think and not just in dollars but in dissatisfaction down the road. They damage easily, they’re brittle and crack easily, they expand and contract more to the point they pull apart or buckle, they make loud click-clack noises when you walk on them. All the above have nothing to do with the vehicle you drive or whether you drive straight or zig-zag. Oh and by the way who drives perfectly straight in and out of anything. As soon as you turn your wheel the slightest bit you are stressing and stretching those Peg & Loop connections.

We used to sell hollow polypropylene tiles but they were so problematic we stopped. If you are doing a commercial or industrial application don’t even think about polypropylene tiles! Even though those types of tiles are heavily marketed they are inferior in quality and prone to failures.

In sum it makes no difference in the car you drive or in what direction you drive, you want to buy a solid quality tile that will be worry-free and indestructible. No matter where you are in the world, you’ll need to research the best tiles for your garage. Having a look at the best garage floor tiles australia will help you find what you are looking for if you are living there, this is just an example as you can search anywhere where you are and you’ll be able to find the right one for you.

More facts and fiction on garage tiles in a future post.


To Grind Or Not To Grind

Grinding is a very good way to get a concrete floor to the right profile for an epoxy coating. Grinding also saves time if you have a good vacuum system that will get all the dust off the floor. You then don’t have to wait for the floor to dry after rinsing and or etching. If you need to rinse the floor down to get rid of all the dust we recommend that you sprinkle some acid etching onto the floor and etch the floor while you are rinsing. Let the etch fizz for 5 or so minutes before you rinse. This way you are cleaning the dust and opening the pores of the slab a little more at the same time. But the main benefit of grinding is saving the drying time of a wet floor.

The key is to have the right machine for the job which is the main reason for this article. You can read more about grinding in a previous post. But for now we are going to assume you’ve decided to grind. Our advice is to go onto the Blastrac website and contact one of their dealers to rent you the appropriate grinder and vac system. They have locations all over the country. The’re also very knowledgeable and will rent you the right machine for your job. Not too big and not too small.

IMG_3464

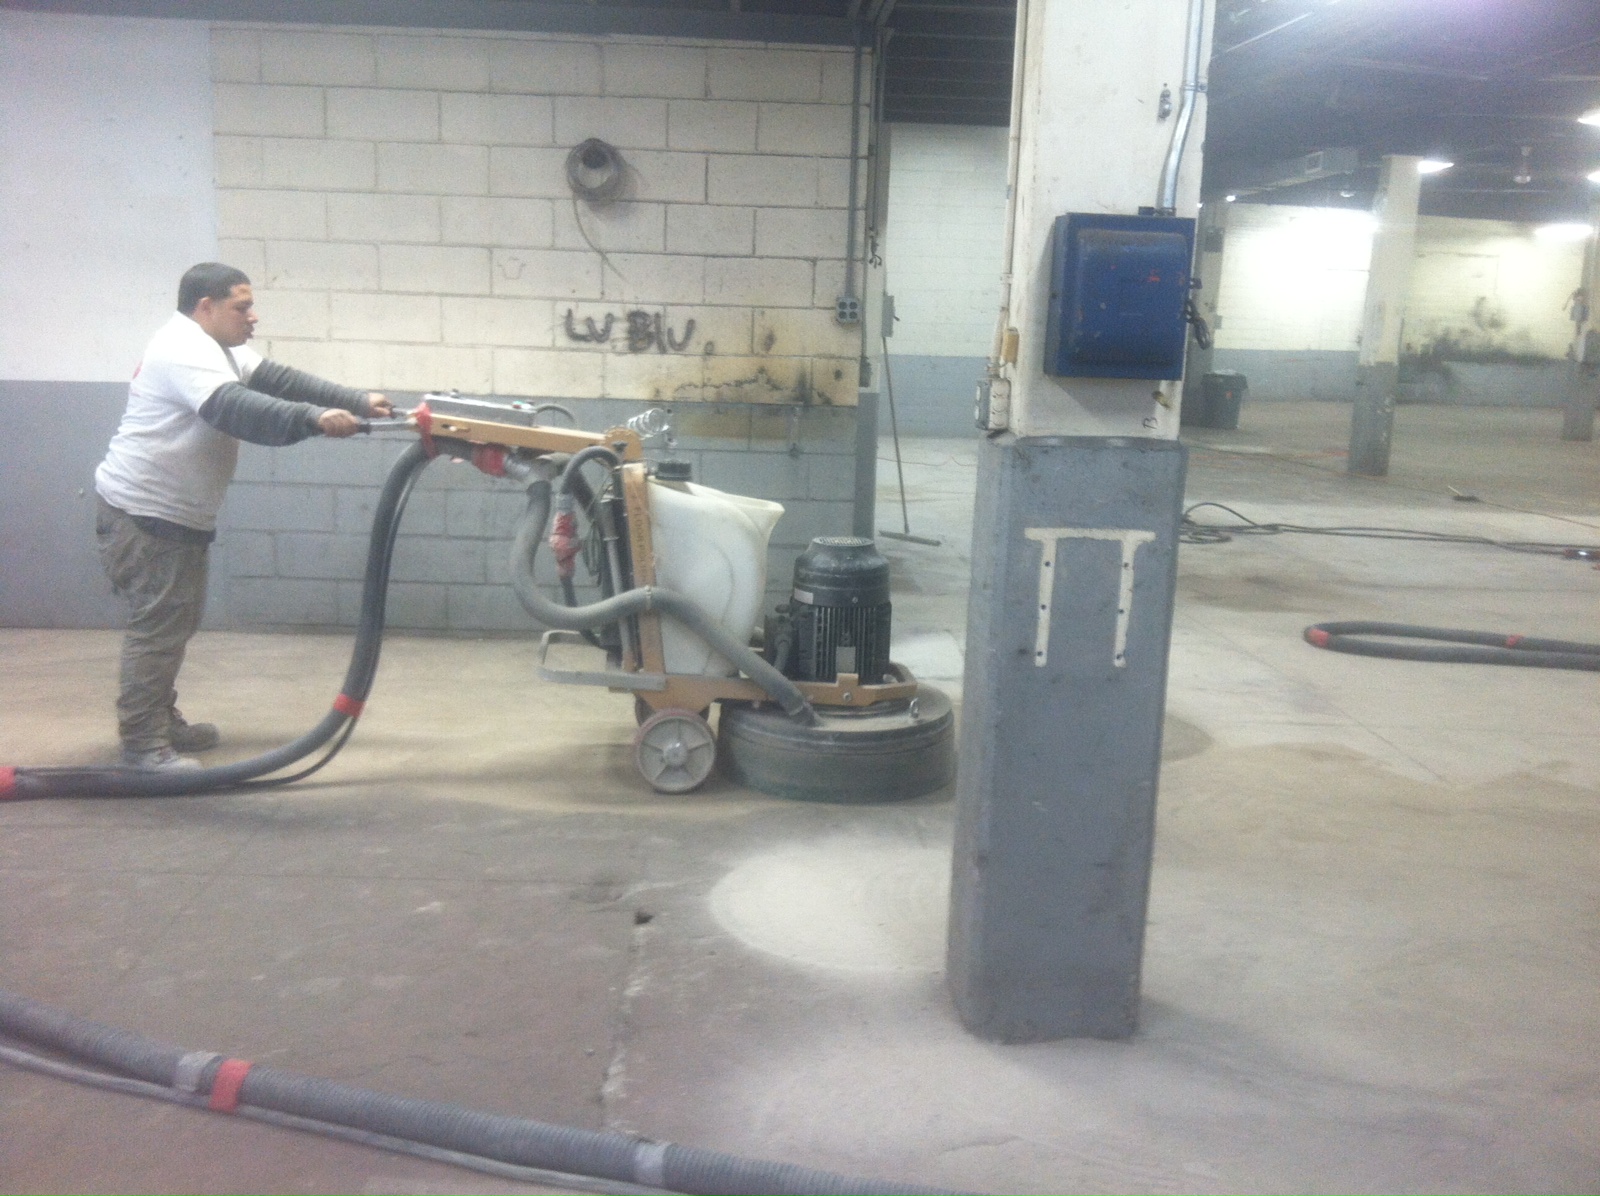
Above is an image of the proper size machine for a large commercial duty floor. Notice the difference between the grinded areas and the areas that have not been done yet. That is what your concrete needs to look like whether you are grinding or etching, whether your floor is large or small.

Grinding is a method that, as you can see above, is a method that can be used for cleaning and polishing surfaces. You’ll find that there are grinders small enough to do any size surface, and there are tools like a buffing wheel for bench grinder that allow you to ensure your grinder is in the best condition when you’re polishing. It is one of the most effective methods for polishing surfaces, so it is definitely worth using if you need to polish a surface.


Roof Leaks Part 3

Here are some more common roof leaks. Below is another example of a Goo repair job. Please understand that no matter how much Goo you apply it’s still going to most likely end up like this. If you don’t believe us, you can even ask the Middletown NJ Roofing Replacement guys. They’ll say the same thing. Repeated applications only mean the cracked material is thicker than it was before. Whether it’s a 1/4″ thick or 4″ thick once it gets dry and brittle it will crack and it will leak. Leaky roofs are the last thing you want on your hands which is why at the first sign of your roof bearing a problem, you might want to reach out to roofers like these – https://www.trusted-roofing.com.

flatRoof06Flashing

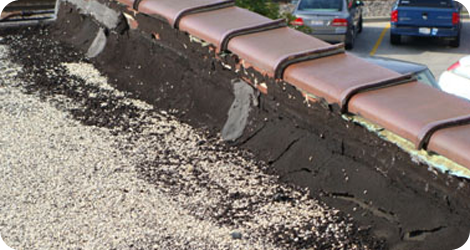
This is a very common area for leaks. The seam at the top or even middle of a parapet wall. This seam was never flashed properly and never had a counter flashing installed. You need to mesh and mastic any seam on a parapet wall and then you should install a counter flashing like the in the image below.

parrapet

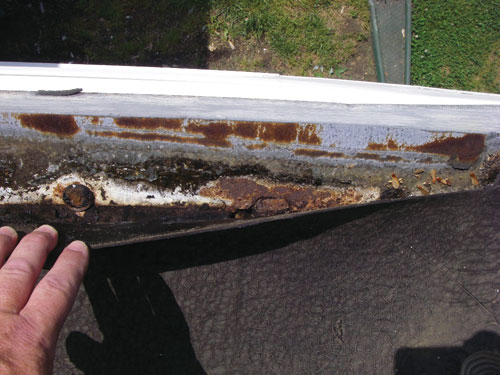
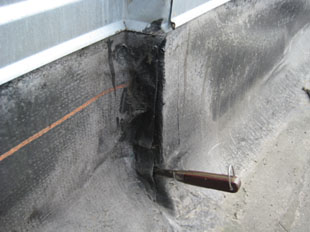
Here we have a very nice counter flashing but the vertical seams are starting to go. This is where a good epoxy roof mastic will save the day. When experiencing roof leaks you need to do a careful visual with your eyes and physical inspection with your fingers. You need to test every seam. Even the slightest separation at a seam will leak,

split parrapet seam

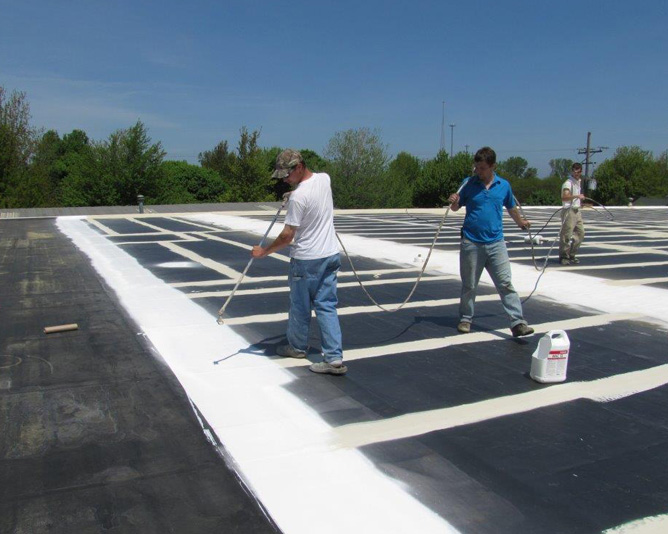
To solve this issue simply clean the area, apply a thin coat of our Roof Mastic and then work in some roof mesh with a serrated rectangle trowel until the mastic starts working it’s way up through the mesh. Then apply another layer of mastic just so that the mesh is no longer visible. Keep the mastic to a minimum, use just enough to seal and cover the mesh. The mistake most people make is that they just get up on the roof and start slapping gobs of goo all over the place. More goo is not better and is usually worse than less goo. Try our mastic and mesh method, we think you’ll like the results. Here’s a good example of restoring a roof with a commercial roof coating the right way. When done like this you will get as much or more longevity as an entire new roof at a fraction of the price. We understand that not everyone’s willing to fix their commercial roof, especially if there’s a lot of damage, and that a professional roofing company may be needed, but if you have the ability to fix this yourself you’ll get a lot of financial gain. Notice that all the seams are covered with mastic and then the coating is applied over that.

While doing your own repair of your roof may cost less, it is only a short-term resolution and not everyone has the capability to get up on their roof and follow these steps. In this case, hiring a professional company like roofing St Louis is a much better resolution and they will offer a much more long-term repair.

mastic joints


Roof Leaks Part 2

When you see or feel the first drips of water coming down from your ceiling or roof the first thing you tend to do is want to run to the store and buy a bucket of black tar to patch the leak. There are a few problems with this. First is the fact that where you see the water coming down is most likely not where the leak is occurring. So the first thing you should do is try to determine the source of the leak. This can be extremely frustrating and time consuming so you might want to get roofers in columbia md to help you. Next thing you should do once you determined where the leak is from is figure out the best repair method.

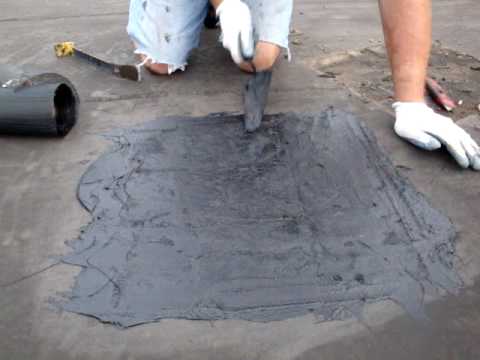
Applying roof patch is great at first and looks like this when you first apply it.

roof patch

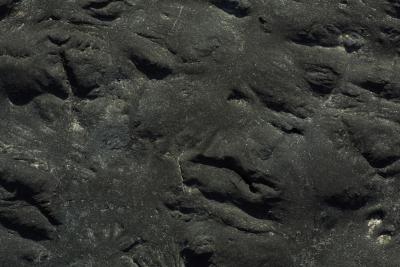
But then before you know it it looks like this

KARANCK PATCH

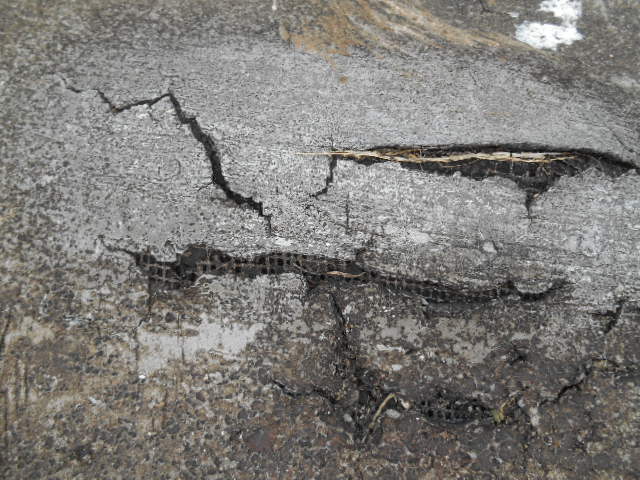
And finally this starts happening

5CracksFlatRoofLeaks

Then you get sucked into the never ending patch trap. You are continuously applying patch to various areas of your roof and even trying different patch products. Until you end up with a giant mess on your hands and a still leaking roof. Tar based patch or black goo products like we call them are great for temporary emergency leak stop. But they’re not made for longevity. Once the sun starts baking them they get brittle and crack. Most times the cracks are not plainly visible and you think the patch is still good when it’s not. So you either miss seeing the leak or you just pour more goo on the problem. This a problem cause eventually you will want to fix the leaks properly and permanently. But with all that goo up there it makes it much harder to do a proper repair job. You may find yourself needing to hire some professional Roofers to help solve the issue.

Keep the goo to a minimum and once it’s fully cured after a few weeks you can go over it with a permanent mastic or roof coating.

If your applying goo all over your roof and it’s still leaking it may be that the roof material has just worn out and is now porous and water is working it’s way right through the roof membrane. Most times it’s cheaper, faster and a lot less frustrating to apply a roof coating over your entire roof. Our epoxy rubber based Roof Coatings are super strong and will seal up porous roof materials, fill in invisible cracks and other leak causing issues. Our Roof Mastic is far superior to any goo you will put on your roof.

If you’re particularly handy with power tools and have a persistently leaky roof, then you might want to invest in an air compressor. These tools can perform so many tasks around your home, from inflating bicycle tires and soccer balls to fixing nails on a leaking roof. If an air compressor sounds like the solution you’ve been looking for, this guide on Toolsduty could help you choose one that will work best for your needs.

So to sum up, if you’re sure you have an isolated leak and have located it for sure, go ahead and patch it but at least use a high-quality roof patch. If your leaks seem to be popping up in different places like the bump in a rug scenario. Don’t waste your time and money trying to spot fix it. Coat your entire roof and be worry-free for the next 15-20 years.

It would make more sense though to involve the services of a roof repair company (just check out a company like www.missouricommercialroofingpros.com). This will help save you time in the long run and you won’t have to worry about fixing the exact spot. You might even feel more reassured since a professional has fixed your roof for you and this means that your roof should be all good for the next few years. This is particularly useful if you don’t have very good roofing skills. There’s no point fixing a roof if you don’t know what you are doing.